
Photographing Slot Canyons
What comes to mind when you think of slot canyons? If you’re like most people, you’ll envision that perfect beam of light coming down into Antelope Canyon. But most people don’t realize that slot canyons come in many different shapes, sizes, and colors. Some are mossy green and verdant. Others boast bold, colorful stripes in sandstone. Some canyons are composed of white rock while others have beautiful cascading waterfalls. Some are so dark you need a headlight and others are so narrow that you can’t even wear your backpack! Because of this variety, slot canyons are one of my favorite subjects for landscape photography. They offer insight into a hidden world of sculpted sandstone, water features, and the most beautiful reflected light you’ll ever witness! With the advent of the internet, interest in photographing slot canyons has grown by leaps and bounds. Canyons that were once seldom visited now see large crowds. But for those willing to get off the beaten path, there are myriad canyons that offer complete solitude and unparalleled beauty. With the desert being my specialty, this article will focus on photographing slot canyons in the Southwest. We’ll talk about logistics behind visiting them, what kind of camera gear we recommend, and how to improve your compositions. If you’re heading to the Southwest, make sure you check out our Half-Day Slot Canyon Photo Tour!
Heaps Canyon, Zion National Park 15sec, f/11, ISO 160
Southern Utah and Northern Arizona have the greatest concentration of slot canyons in the world. There are hundreds of canyons in this area – some have never been descended before! A few of the best areas for finding slots include Zion National Park, Grand Canyon, San Rafael Swell, Robbers Roost, Grand Staircase Escalante, and Glen Canyon. Canyons generally fall into two categories: Technical and Non-Technical. Technical canyons require use of ropes, harnesses, and other safety gear. They should only be attempted by those with the requisite skills. Non-technical canyons are much easier for photographers to access. You can walk right into some where others may require mild scrambling and down climbing. Canyons can vary tremendously in length and difficulty. One of the reasons why Antelope Canyon is so popular is because you can visit it in just an hour on a simple walking tour. On the other hand, some of the big canyons in Zion require a long approach and a multi-day trip.
Buckskin Gulch, Vermillion Cliffs NM, 1/6sec, f/14, ISO 640
Slot canyons can be done in all seasons of the year. Spring and fall are ideal as the weather is still warm and thunderstorm risk is low. In summer, there are often risks of afternoon thunderstorms. Check the weather carefully since getting caught in a flash flood can be life-threatening. It may not even rain where you’re at, but if an area upstream gets hit by a big thunderstorm, a flash flood can form from miles away. It’s best to get an early start for slot canyons and try to be out of the narrowest sections by afternoon. If doing a long canyon, only enter on days when precipitation chances are low. Canyons can also be descended in the winter, but snow/ice are often present and special gear like drysuits, ice axes, and crampons may be required. To see what a winter descent looks like, watch the video below. We decided to descend the Subway top-down during one of the coldest days of the year. The approach was particularly difficult with the deep snow and icy crust layers. But it was one of the most surreal experiences I’ve ever had:
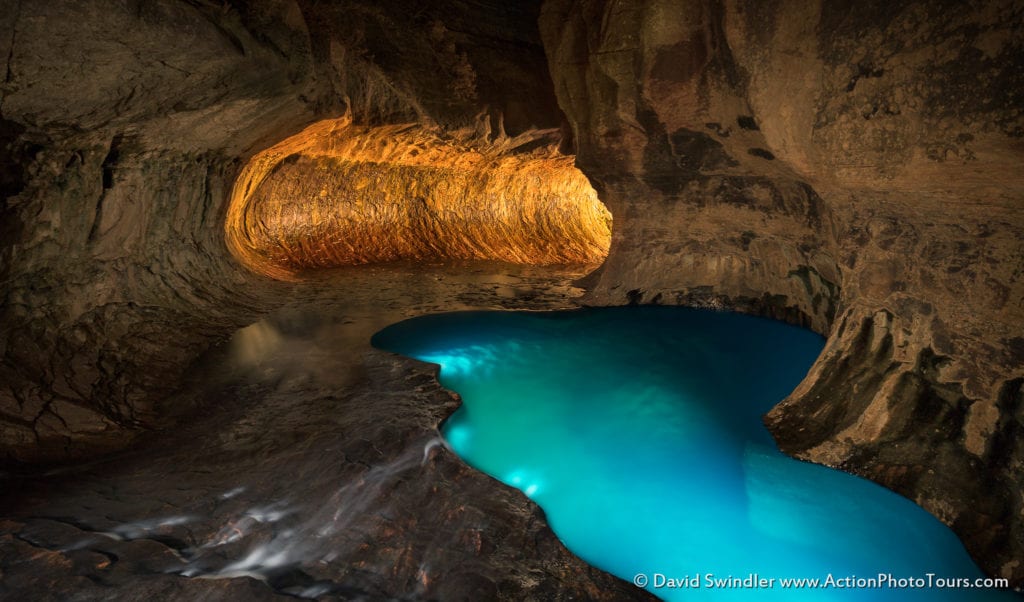
In order to get quality shots in a slot canyon, you need a tripod. Canyons tend to be pretty dark places and long exposures are the norm. Bring your widest lenses and try to avoid changing lenses inside if it’s dusty. You’ll set your ISO and Aperture based on available light. That will vary widely depending on the depth of the canyon and time of day. If there is sufficient light such that my exposures are staying below 30sec in length, I shoot for ISO 100-200 and f/11. When it gets darker, I have to either increase ISO, open up the aperture, or both. Which path you take will depend on your depth of field requirements and your camera’s ability to handle higher ISO noise. The shot below is of the Iron Room in Heaps Canyon. Since this is a very dark place, I raised the ISO to 320 and took a 15sec exposure. I didn’t want to go much longer than that since my tripod position was pretty precarious. I often get asked whether a polarizer is useful. A polarizer is great for removing glare from wet rocks, bringing out the true color of water, and achieving longer exposures. My rule of thumb is to bring a polarizer for wet canyons and no polarizer for dry canyons. If you do bring a polarizer, make sure you can take it on and off quickly since there will be many times when you won’t want it on there. Finally, I like to set my White Balance to Cloudy in slot canyons. I know for RAW files you can always change White Balance in post-processing. But cloudy will give you the best starting point so you don’t have to adjust every photo after the fact.
Heaps Canyon, Zion National Park, 15sec, f10, ISO 320
Many people have seen photos from Antelope Canyon and really want to go there. Here is some practical advice. Expect lots of people, lots of noise, and a very dusty environment. Lower Antelope Canyon is little more relaxed but be aware that they don’t offer photo tours Mar-Oct. In Upper Antelope Canyon, they will cram upwards of 500 people through the quarter mile slot during the hours of 11AM-1PM. The light beams in Upper Antelope are spectacular and you won’t find another canyon that can replicate it. The best months for light beams are mid-March through Sept. On your photo tour, you will be led to several different spots where you’ll wait until they can get all the people out of the way. How good your photos will be will depend on your position within the group. I recommend trying to be in the front center. If you’re on the edge, it can be difficult to get a good composition. You’ll have maybe 1-2 minutes max to take shots before they let the people come back. Because you’re so limited on time, I recommend shooting at f/8 and ISO 200-800 depending on light levels. Make sure you are actively reviewing your histograms in RGB mode. It’s very easy to blow out the red channel if you’re not careful. The areas where the light beams hit the ground are considered specular highlights and are expected to blow out to pure white. But make sure all your other highlights are in check.
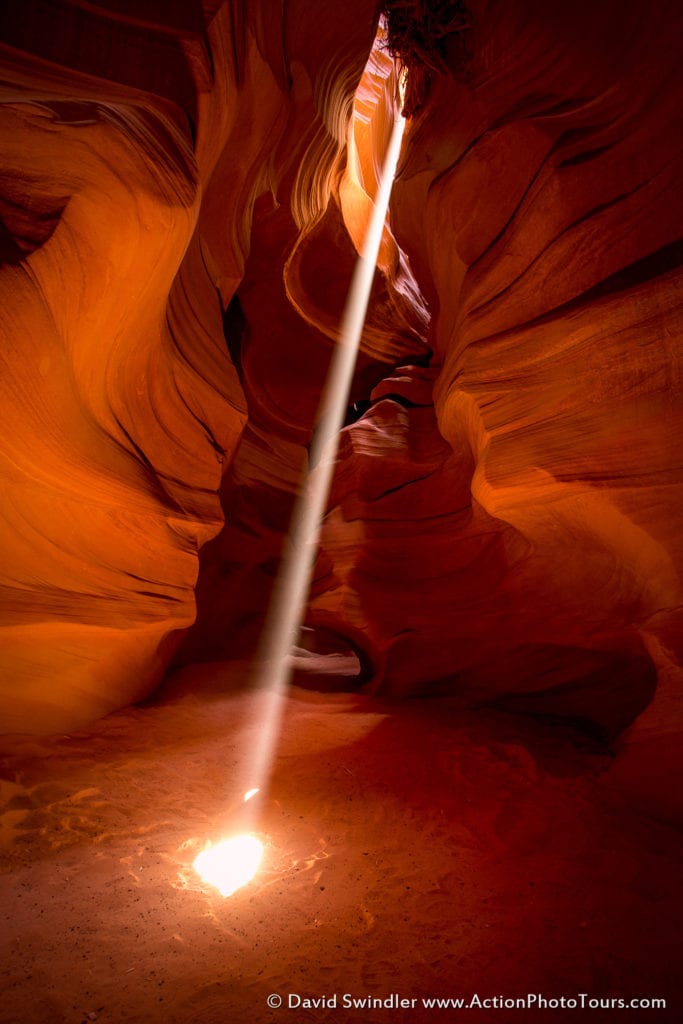
Upper Antelope Canyon, 2.5sec, f/9, ISO 640
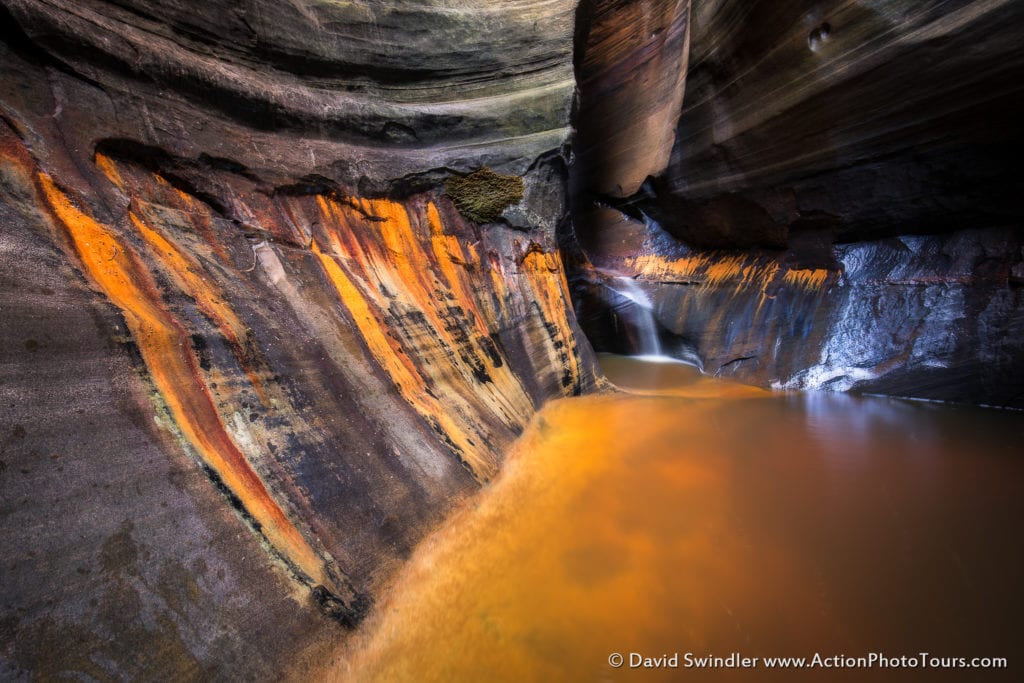
When you’re in a slot canyon, avoid direct light at all costs. Instead, look for reflected light which occurs when direct light bounces off one wall onto another. This is the kind of light camera sensors love. It’s low contrast, warm, and offers that perfect glow. In the example below, a small shaft of light was illuminating the wall just around the corner. This caused the surrounding walls to glow as if they were on fire. Generally speaking, you’ll want to photograph deep slots around midday for the best chances for reflected light. However, when the angles are right, you can get reflected light even mid-morning and through the afternoon.

Remote Non-Technical Slot Near Kanab, UT, 4sec, f/11, ISO100
Next you’ll start looking for an ideal composition. The eye is naturally attracted to the highlights. Putting the brighter highlights towards the back of the image has the tendency to draw the viewers’ attention all the way through the image. This makes the photo seem much more lifelike and 3-dimensional.
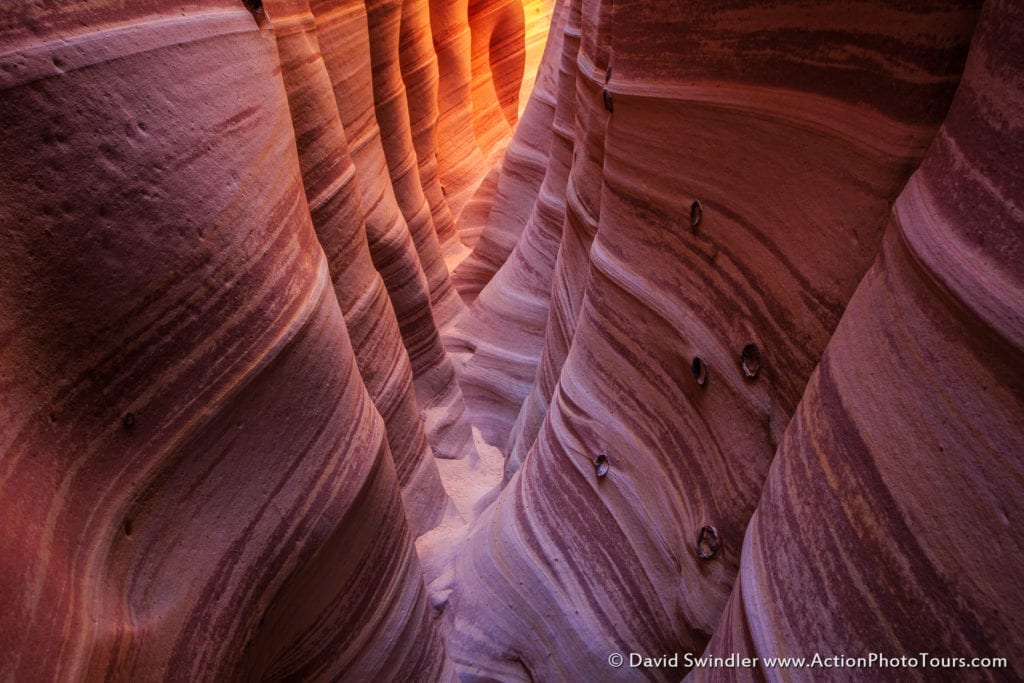
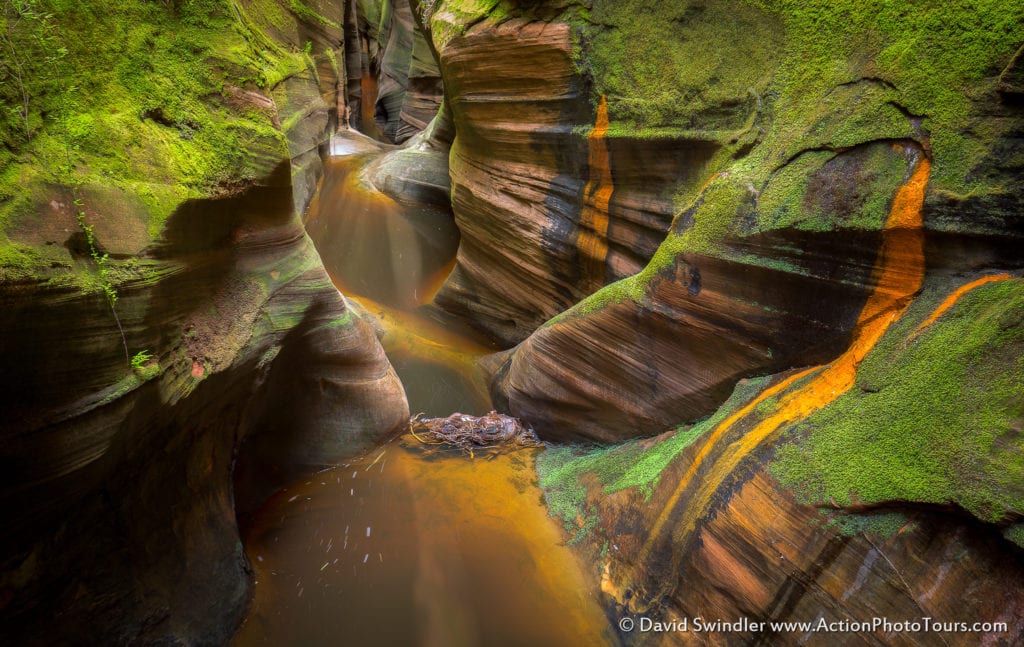
Zebra Canyon, Grand Staircase Escalante 0.5sec, f/13, ISO 160
When possible, try to find leading lines to enhance your compositions. This is where your wide angle lens will really pay dividends as it can really amplify and augment sandstone lines and textures. Rather than shoot right in the middle of the canyon, move closer to one wall or the other depending on which one has the more interesting light and or patterns. You may need to encompass focus stacking techniques if you become too depth of field limited. There are many focus stacking tutorials online, so I will not delve into that in this article. For the shot below, I had to do 3-4 focus stacks since I was so close to the right foreground wall.
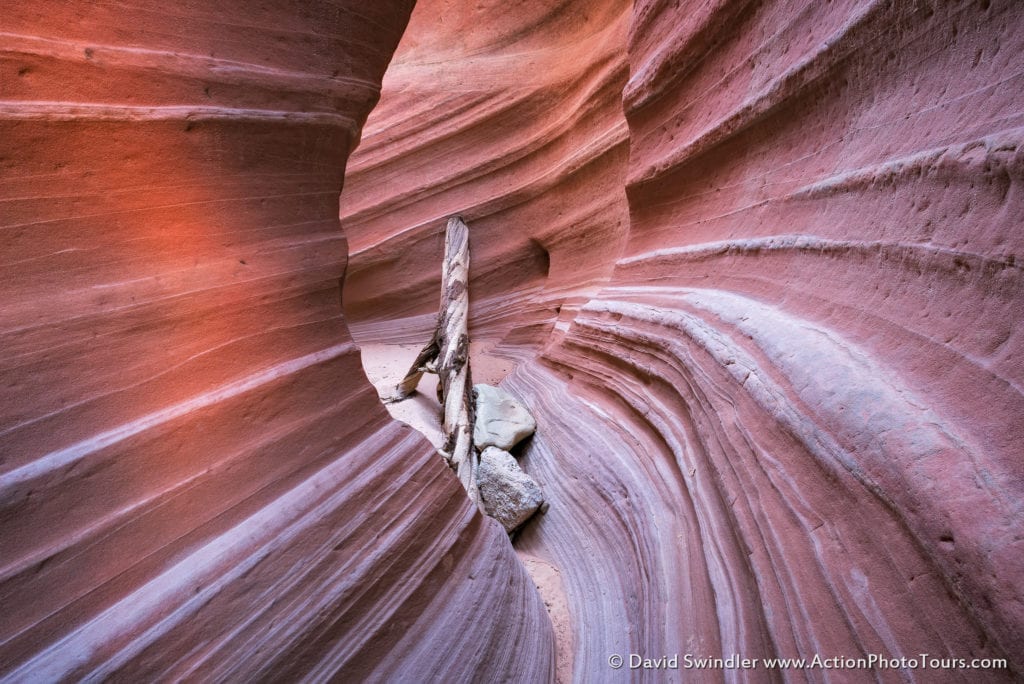
Remote Slot Canyon Near Kanab, UT, 2sec, f/11, ISO100
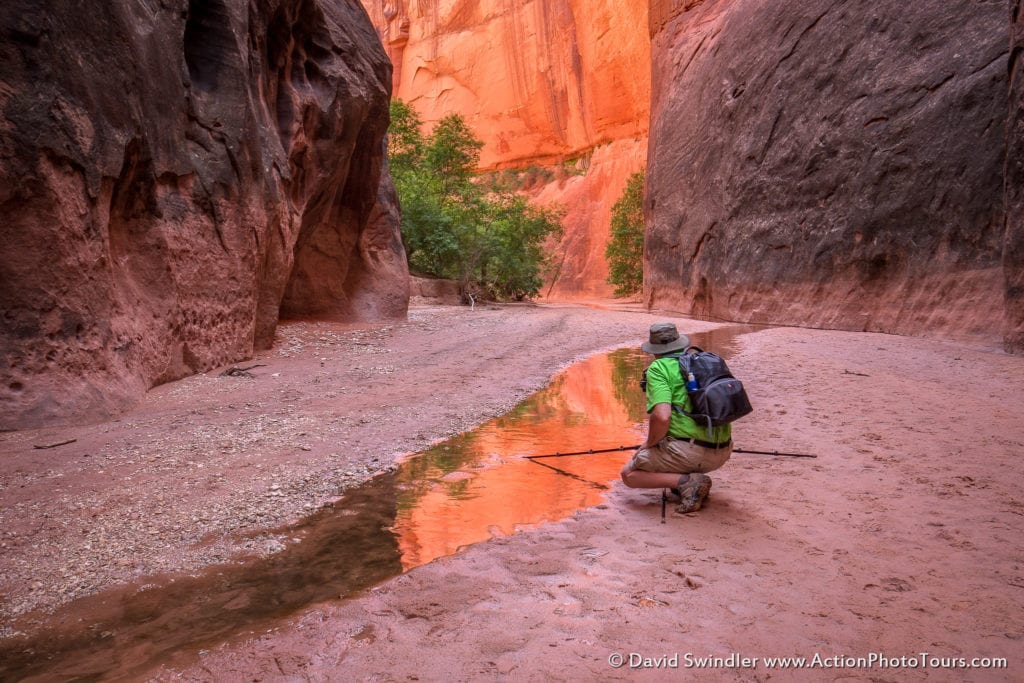
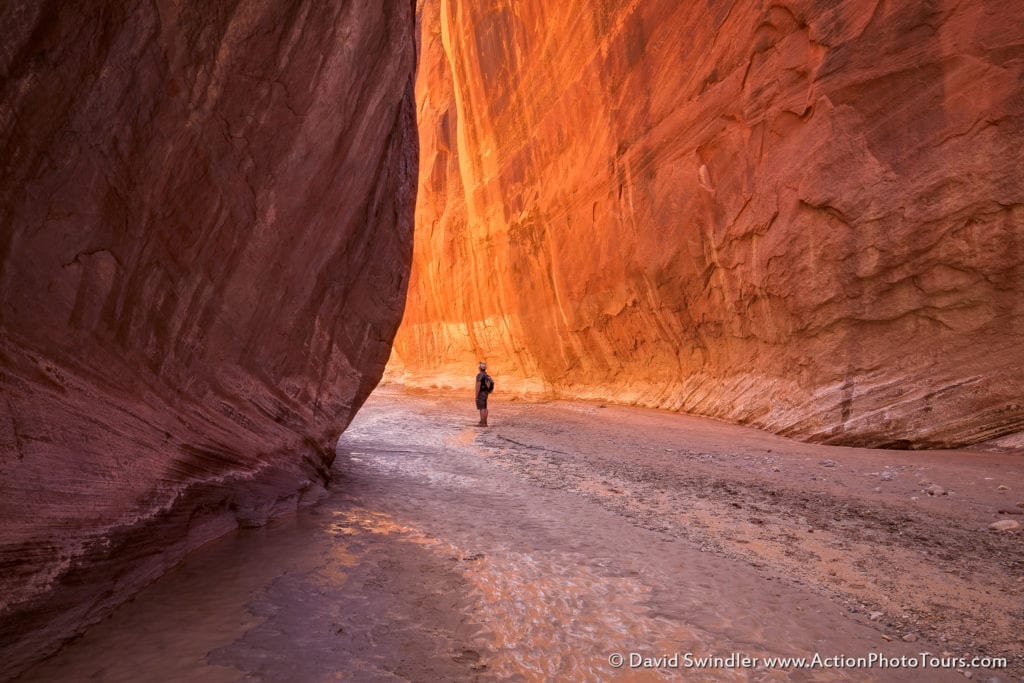
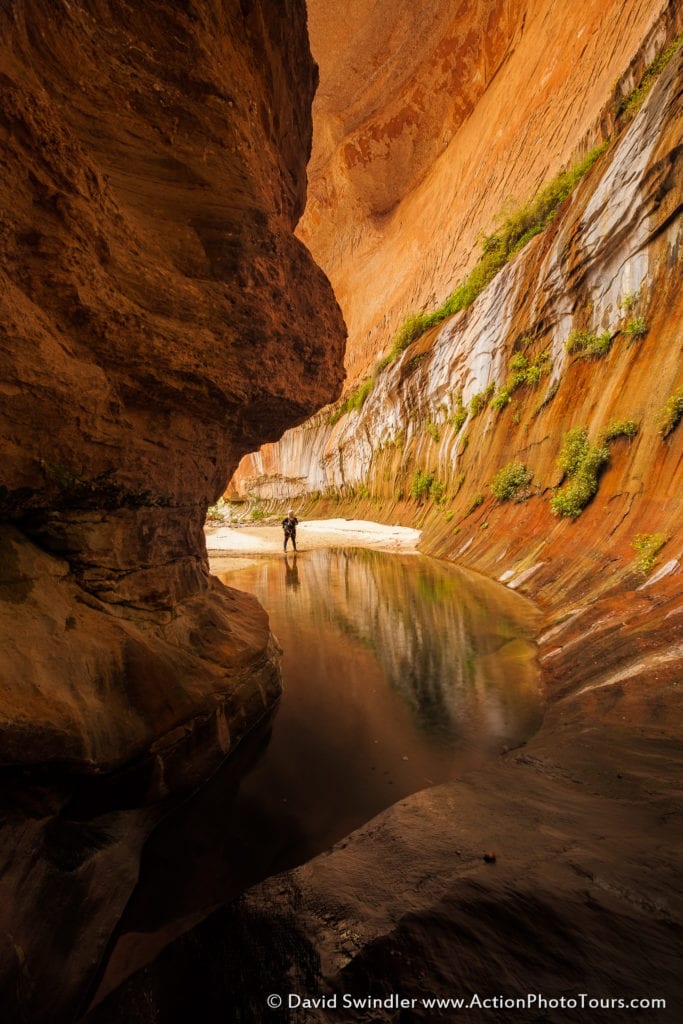
I know landscape purists will balk at this, but including a well-placed person in your slot canyon shots will do wonders to help show the scale. It’s sometimes hard for viewers to connect with images from canyons since they are such foreign environments. By putting a person in the shot, they can immediately visualize themselves there and will appreciate the photo that much more. Many of my favorite slot canyon shots have a person in them. Unless you have someone in the frame, it’s tough to know just how big and immense and canyon can be.
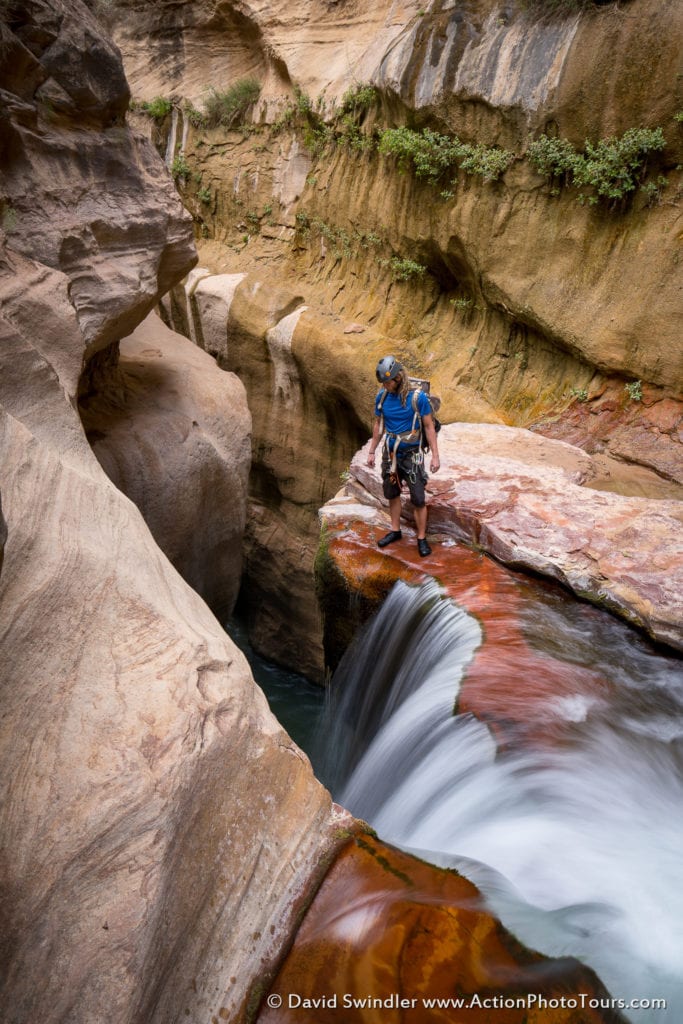
Parunaweep Canyon, Zion NP, 0.4sec, f/11, ISO 100
Paria River Canyon, 0.4sec, f/14, ISO 160
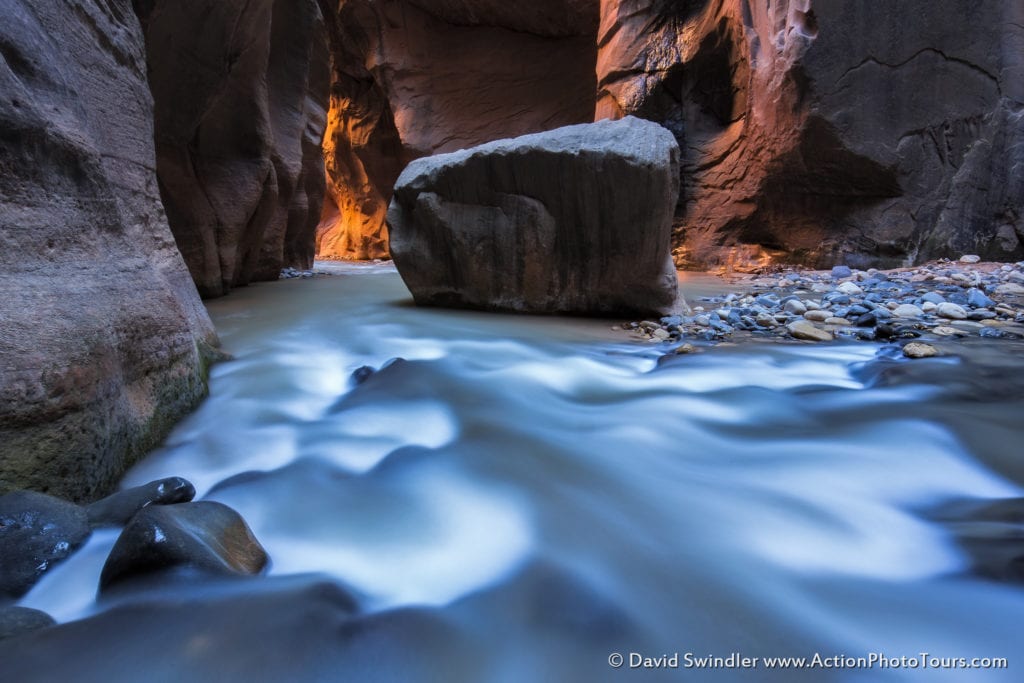
Wet canyons are definitely my favorite. The interplay of water and light is fascinating and opens the door to so many photographic compositions and moods. When you have flowing water, aim for shutter speeds anywhere from 1/4 sec up to 8/10 sec to get that soft flow effect. If the water is flowing really fast and hard, you may need even less time than that. Going longer than 1 sec tends to produce an ethereal effect that can be perfect in certain situations. To achieve the desired shutter speed, I recommend using a polarizer and or ND filter. If necessary, some cameras will let you drop below the base ISO (e.g. ISO 50). Make sure you have a sturdy tripod when shooting in water. A walking stick will do wonders if you’re concerned about losing your footing while walking. Keep the camera protected in a backpack and take it slow through deeper sections. In colder months, you may need waders or dry pants. The shot below was taken at 1/5sec. Ideally, I would go longer up to like 6/10sec for better soft water effect, but it’s not easy for a person to hold still while standing in rushing water!
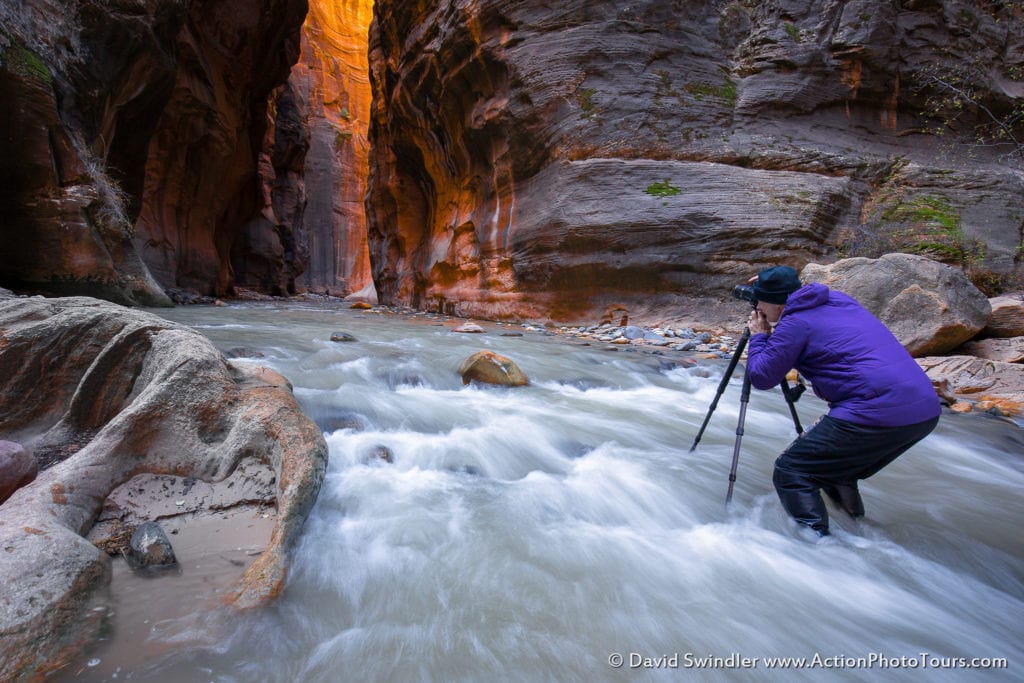
The Narrows, Zion NP, 1/5sec, f/10, ISO 640
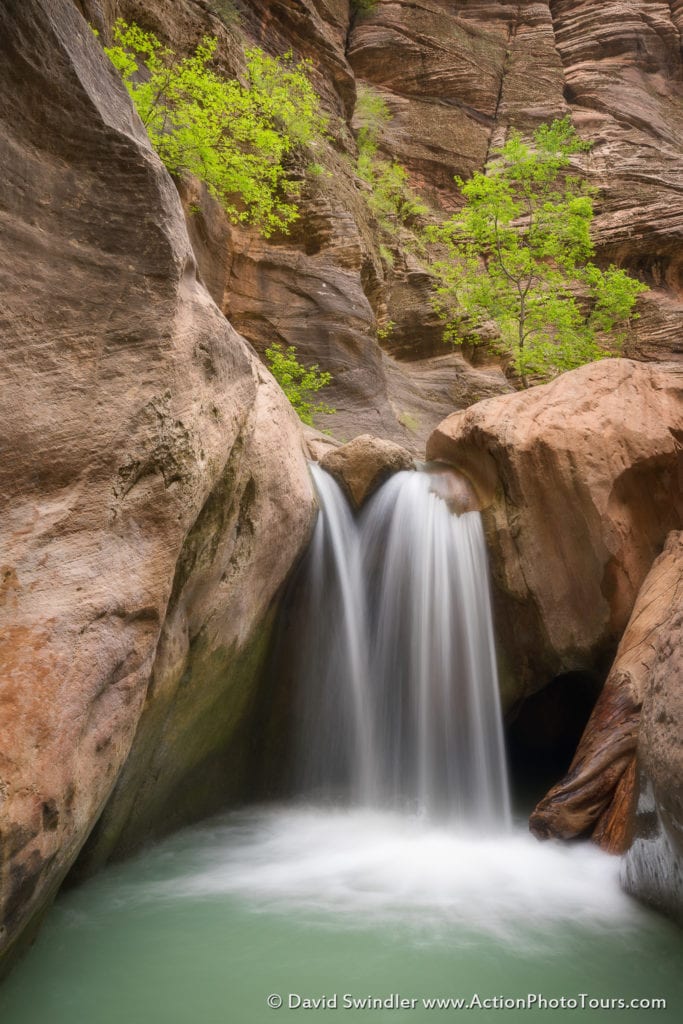
I took this shot of Archangel Falls in Zion NP after we got some fresh snow. A shutter speed of 0.5sec was perfect for showcasing the textures in the flow without any dislocations. Any longer than 1sec would have smoothed out the textures and made it look too milky.
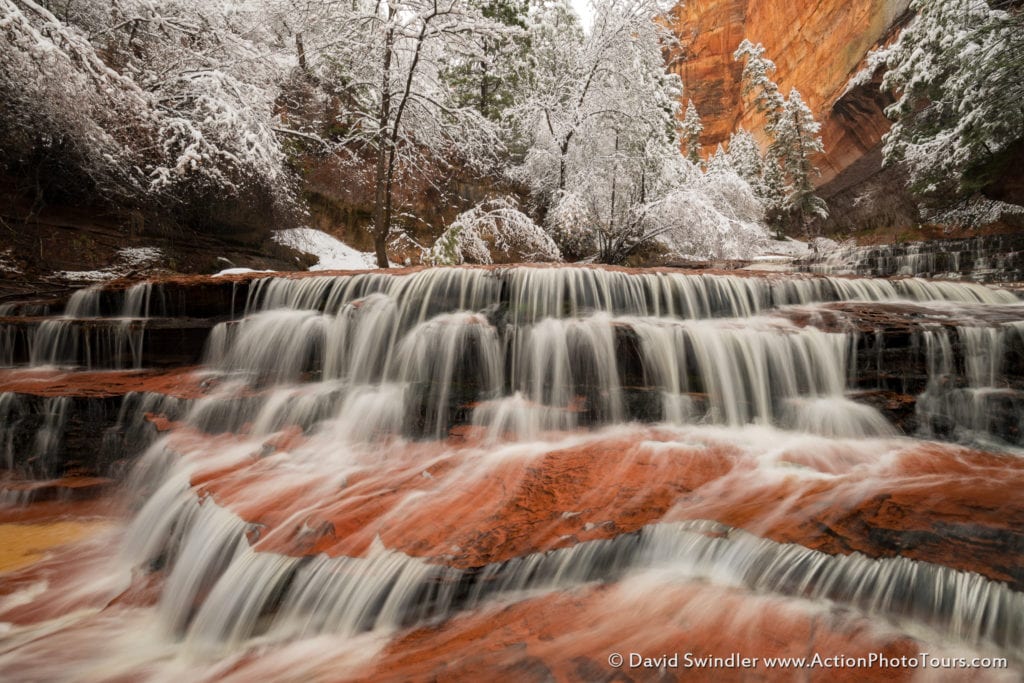
Archangel Falls, Zion NP, 0.4sec, f/13, ISO 100
In this autumn shot of the Narrows, I used a shutter speed of 1.6sec to achieve a semi-milky effect for one simple reason; the focal points of the composition are the foreground rocks and the background trees. The water was there just as an accent and it commands less attention at longer shutter speed. This shot is another example of one I had to focus stack. Don’t be afraid to get down low to augment foreground features. Just be aware of the depth-of-field implications this can have.
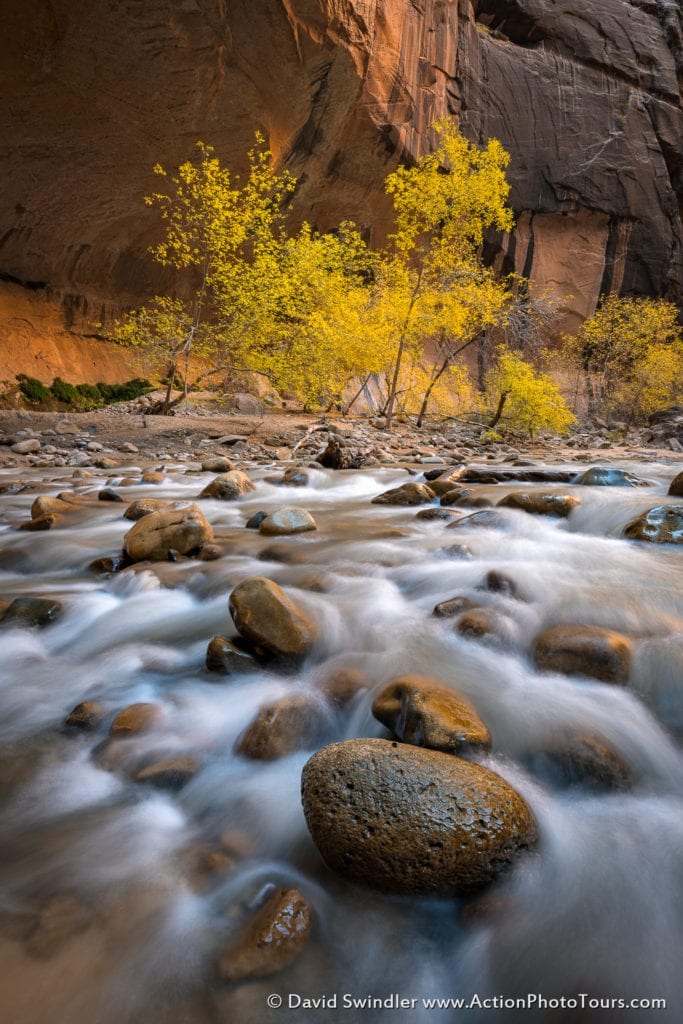
The Narrows, Zion NP, 1.6sec, f/11, ISO 100
Here’s one last shot from the Narrows but this time I used a very long shutter speed of 25 seconds. You can see how ethereal the water flow looks by comparison. Whenever you’re photographing water, take shots at a variety of shutter speeds. You’ll never know what you’ll like best until you see the shots on the big screen.
The Narrows, Zion NP, 25sec, f/22, ISO 200
I want to throw in one more note about safety. In the image below, we were coming down Orderville Slot Canyon and stopped to take shots of this peaceful waterfall. Just as we finished, a couple of people came running down the canyon, with fear engraved upon their faces. “Run For Your Lives!!!” they shouted as they rushed past us. We weren’t sure why they were so scared, but as soon as got away from the waterfall, we heard thunder booming several times a minute with ominous clouds moving overhead. Although we weren’t in immediate danger since there were places we could climb up and out of danger, we didn’t want to risk it. So we packed up our stuff and ran until we reached the exit of the canyon. Fortunately, there was no flash flooding that day in Orderville. But other adjacent canyons in Zion did have some flash flooding. Be very careful if any rain is in the forecast!
Orderville Canyon, Zion NP. 1sec, f/11, ISO 100
If you’re doing a canyon that involves deep water and or swimming, then you’ll need to invest in additional equipment like a wetsuit, a pelican case, dry bags, etc. If you’re on a budget, a GoPro will suffice. I rarely use a GoPro for photos in dark canyons since they don’t do well in low light. But they are fabulous for video! Here are a few suggestions. First, I never trust my electronics to dry bags. I only use hard-sided cases for my camera gear like a pelican case or storm case. Second, make sure your ball head is designed to get wet. Most closed ball head designs will get gummed up from swimming through muddy slot canyons. I like an open ball head design like Acratech for wet canyons. Third, make sure you have a quality tripod. Don’t forget to clean and empty water out of your tripod after your trip. Fourth, bring several dry microfiber clothes in a zip-lock bag since your hands will often be wet with no way to dry them. It’s really easy to get droplets on your lens! Fifth, make sure you have a backpack that drains well or else it’s going to weigh 50 pounds whenever you get out of the water! For those interested in seeing a technical canyon descent, you can view the video below.

Here’s a good shot showing how I carry my gear. My backpack has holes in the bottom to drain water, my camera is in a hard sided case inside the pack, and my tripod is strapped on the outside. Photo Credit: Jeremy Himle
My last piece of advice for you is to get creative. That is what will really bring your canyon photography to the next level. The shot below is the famous Subway Tunnel in Zion. Myriads of photographers have taken this same shot over and over again. How can you stand out from the crowd? Well, we decided to photograph it at night. We hauled 5 tripods down there, numerous dry bags, lights, and wetsuits. Once it got dark, we strategically placed our lights (including a couple underwater lights) and created the image you see below. It’s so different from daytime shots!
The Subway, Zion NP, 60sec, f/4, ISO 200
I hope that this article will inspire you to explore some of the amazing slot canyons of the Southwest. Through my company Action Photo Tours, we help photographers of all levels learn how to read the light, improve their compositions, and explore amazing places they would never find on their own. Visit my website at www.ActionPhotoTours.com to learn more.
The Right Fork, Zion NP, 1.6sec, f/11, ISO 400