
Using Blend Modes to Enhance Your Landscape Photography
Blend modes are one of the most confusing aspects of Photoshop. First off, there’s twenty-seven of them. Further adding to the confusion, many of them have similar names or do similar things. As you cycle through the blend modes, it’s hard to know exactly what’s happening, and their names do little to prepare you for how they will alter an image. Luckily for us landscape photographers, there’s really only a few blend modes we’ll regularly be using. But before that, I’ll briefly cover the basics before going in depth into how you can use them to enhance your photography.
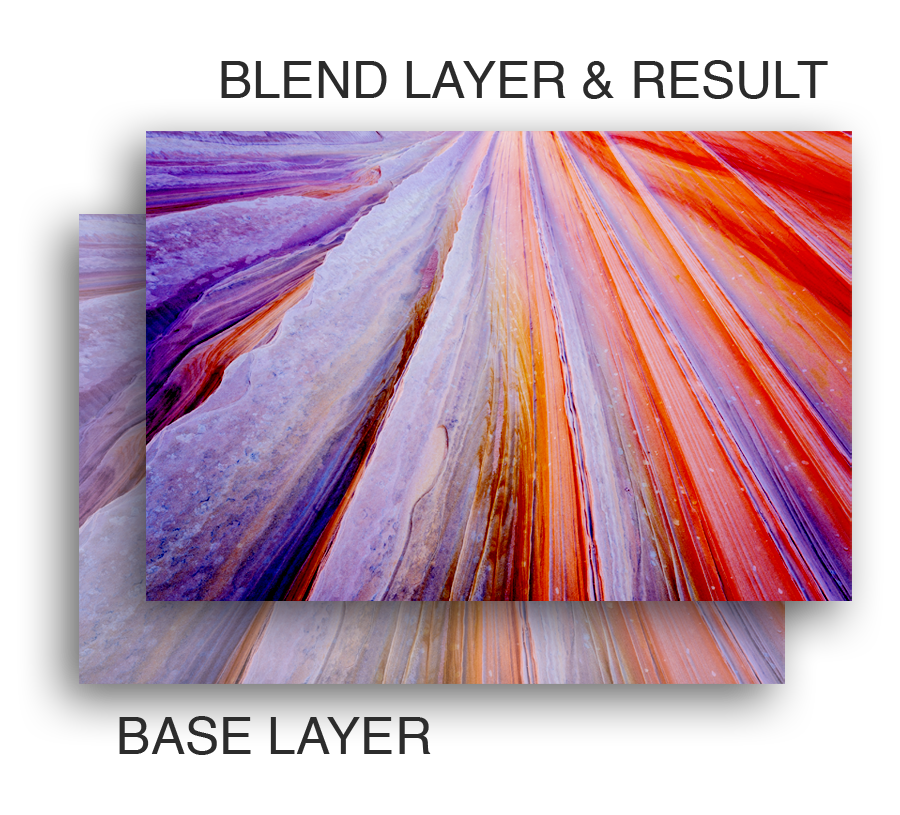
Each blend mode has an algorithm under the hood, telling the pixels in one layer to interact with the layer below in a different way. This interaction may alter the hue, luminosity, or saturation of an image, sometimes all at once. Think of it like a very basic math problem: A+B=C, where A represents your blend mode layer, B represents your base layer, and C represents the final image.
The 27 Blend Modes
Adobe has conveniently broken down each blend mode into categories based on which aspect of an image it manipulates.
Opacity: Neither of these blend modes directly effect the layer below it. Only by adjusting the opacity or fill slider do they reveal a layer below.
•Normal
•Dissolve
Darkening: Each of these blend modes will darken the overall image and saturate colors while pure whites become transparent.
•Darken
•Multiply
•Color Burn
•Linear Burn
•Darker Color
Lightening: Opposite of the darkening blend modes, using these will brighten your image while pure blacks become transparent.
•Lighten
•Screen
•Color Dodge
•Linear Dodge
•Lighter Color
Contrast: Blend modes in this category will increase the contrast of your image. It makes the lights lighter and the darks darker, while neutral grey becomes transparent.
•Overlay
•Soft Light
•Hard Light
•Vivid Light
•Linear Light
•Pin Light
•Hard Mix
Comparative: These blend modes emphasize differences between the blend layer and the base layer.
•Difference
•Exclusion
•Subtract
•Divide
Component: Also known as the HSL blend modes, these alter only the hue, saturation, or luminance of an image and nothing else.
•Hue
•Saturation
•Color
•Luminosity
Brush Blend Modes:
There are two blend modes that only become available when you’re using a paint tool, such as the brush. These tools are Behind and Clear.
When using a brush with the Behind blend mode, only transparent pixels are affected.
Clear works just like the eraser tool, except it does so with the exact same brush you are currently using instead of starting with the default brush shape. This is useful if you are using a non-regular or custom brush, and it simply exists as a time saver.
Opacity VS Fill: what’s the difference?
Simply put, Opacity controls the transparency of everything in a layer while fill controls only the original pixels—not any additional layer styles, such as color overlays or drop shadows. This is more helpful in graphic design than photography.
For most blend modes, there is no functional difference between the opacity and fill sliders. Both reduce or increase the transparency of a selected layer. There are, however, eight blend modes that are differently affected by fill. In these blend modes, the fill slider gives a more natural look than the opacity slider. These blend modes are: Color Burn, Linear Burn, Color Dodge, Linear Dodge, Vivid Light, Linear Light, Hard Mix, and Difference.
How can landscape photographers use blend modes?
Finally, this is the reason you clicked on this article in the first place. While each blend mode has its purpose, only a few blend modes are especially useful when it comes to landscape photography. Below I will cover how you can use these blend modes to enhance your photographs.
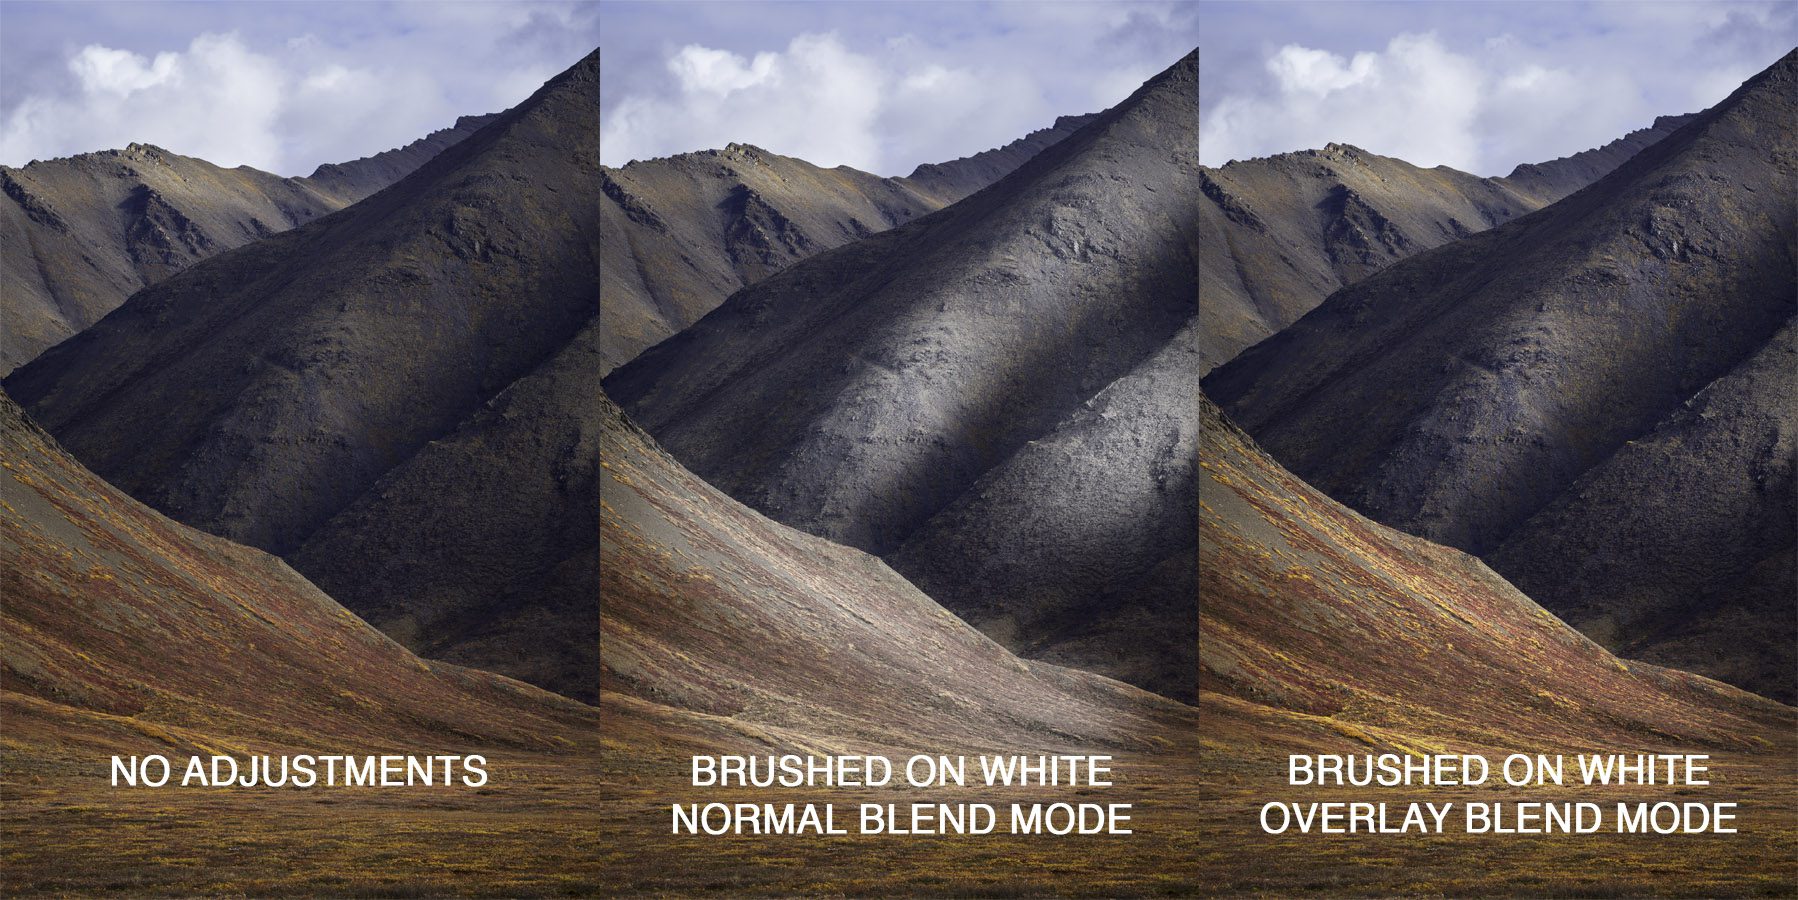
Overlay: This is the de facto tool for non-destructively dodging or brightening parts of an image. Overlay is used in conjunction with the brush tool and white color to brush brightness into specific areas of your photo.
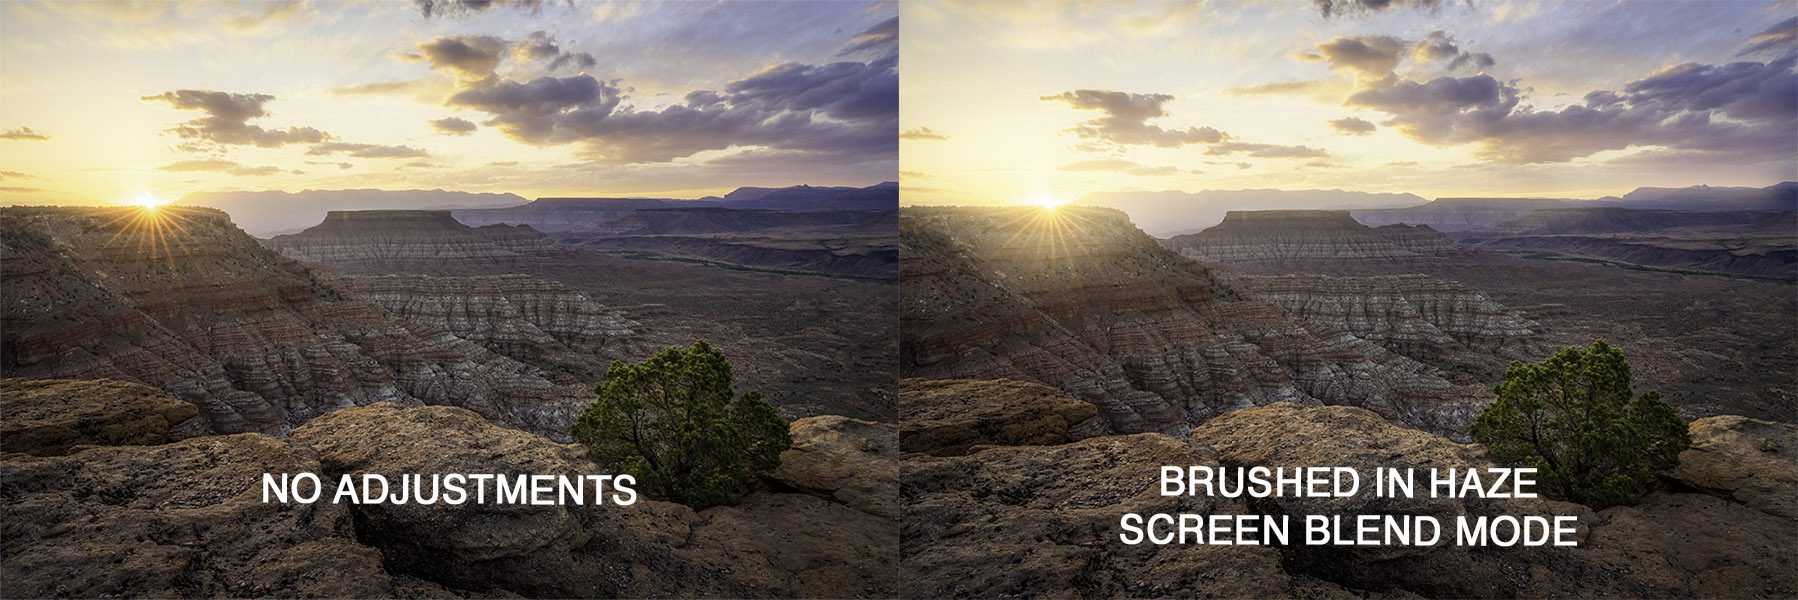
Screen: One of the most common uses of the screen blend mode is to combine many images of the night sky into star trails. Because the screen blend mode also raises black and shadow levels of the layer below, it can be used to paint a colored haze into an image to enhance a sunset or to give your image a mystical quality.
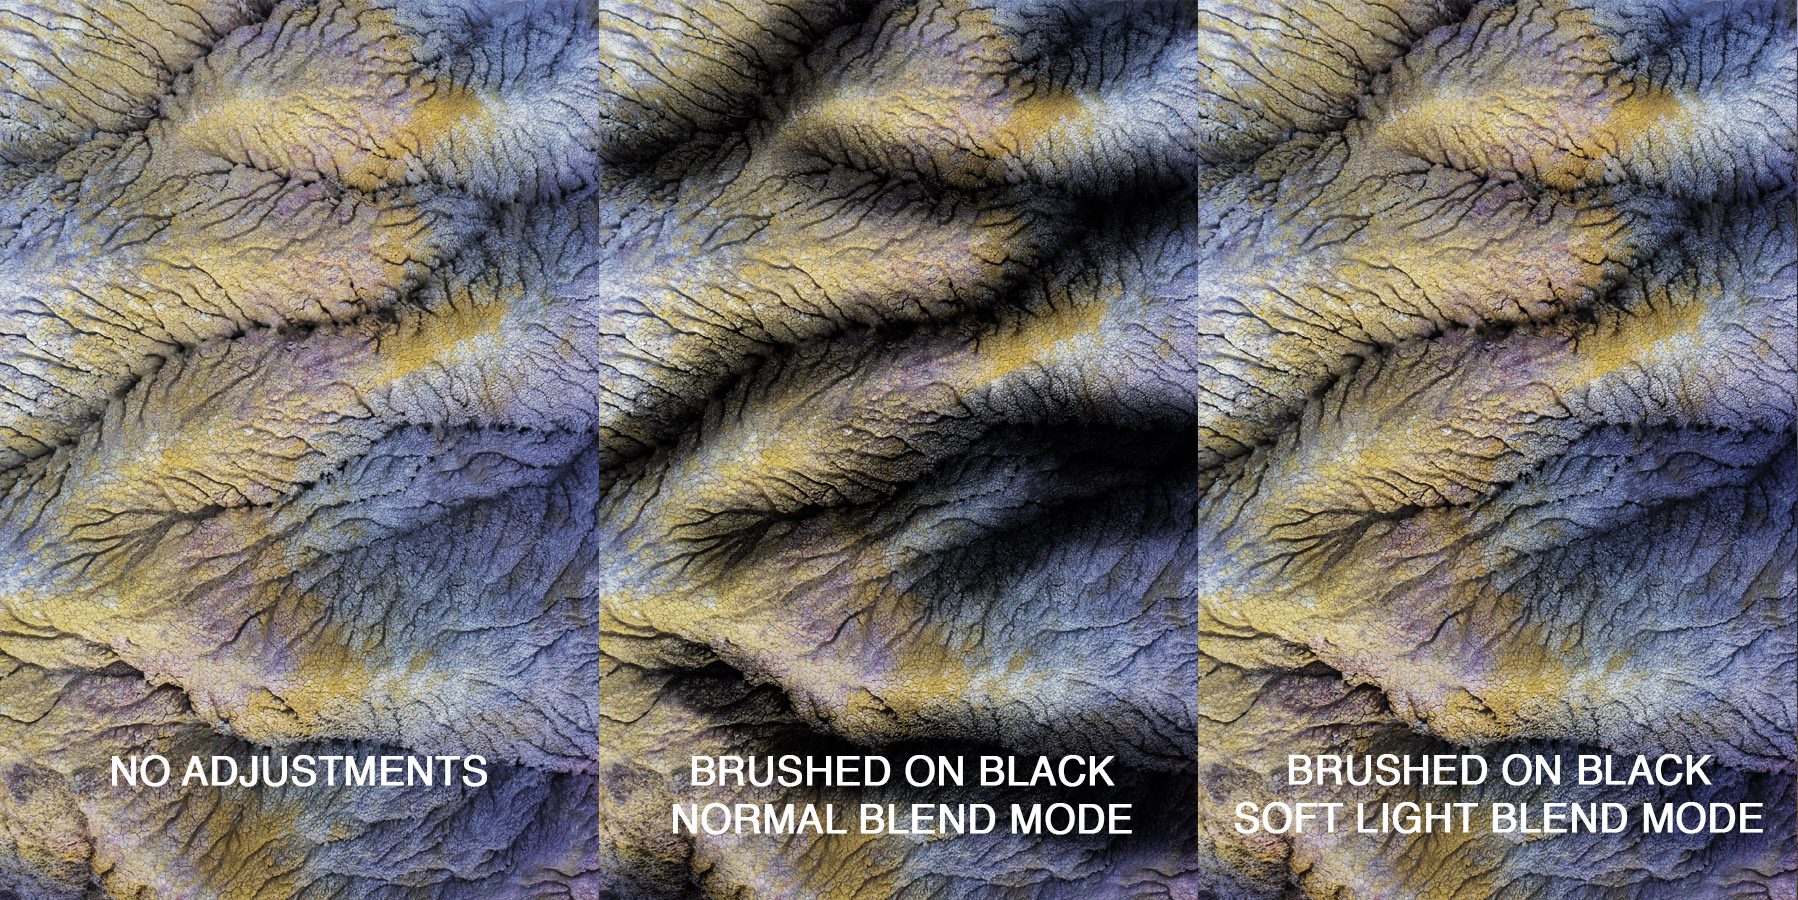
Soft Light: This blend mode is almost always used to burn or darken parts of an image. Soft light is used in conjunction with the brush tool and black color to brush darkness into specific areas of your photos.
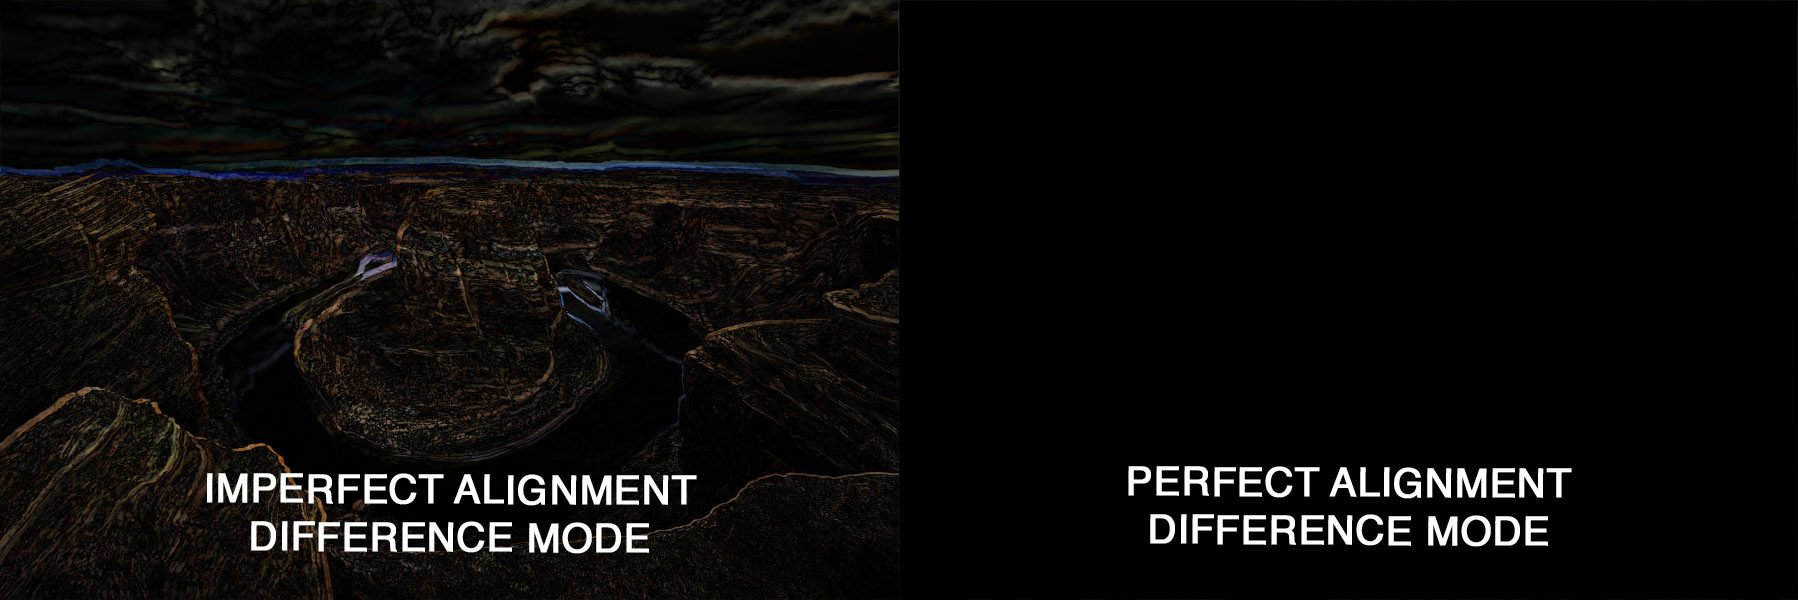
Difference: Difference blend mode helps when trying to align two layers. This is useful for when the camera position has changed slightly between multiple shots. My main use for this is when the Auto-Align function in photoshop fails, and I need to align images manually. Black parts of an image are perfectly aligned while other colors aren’t.
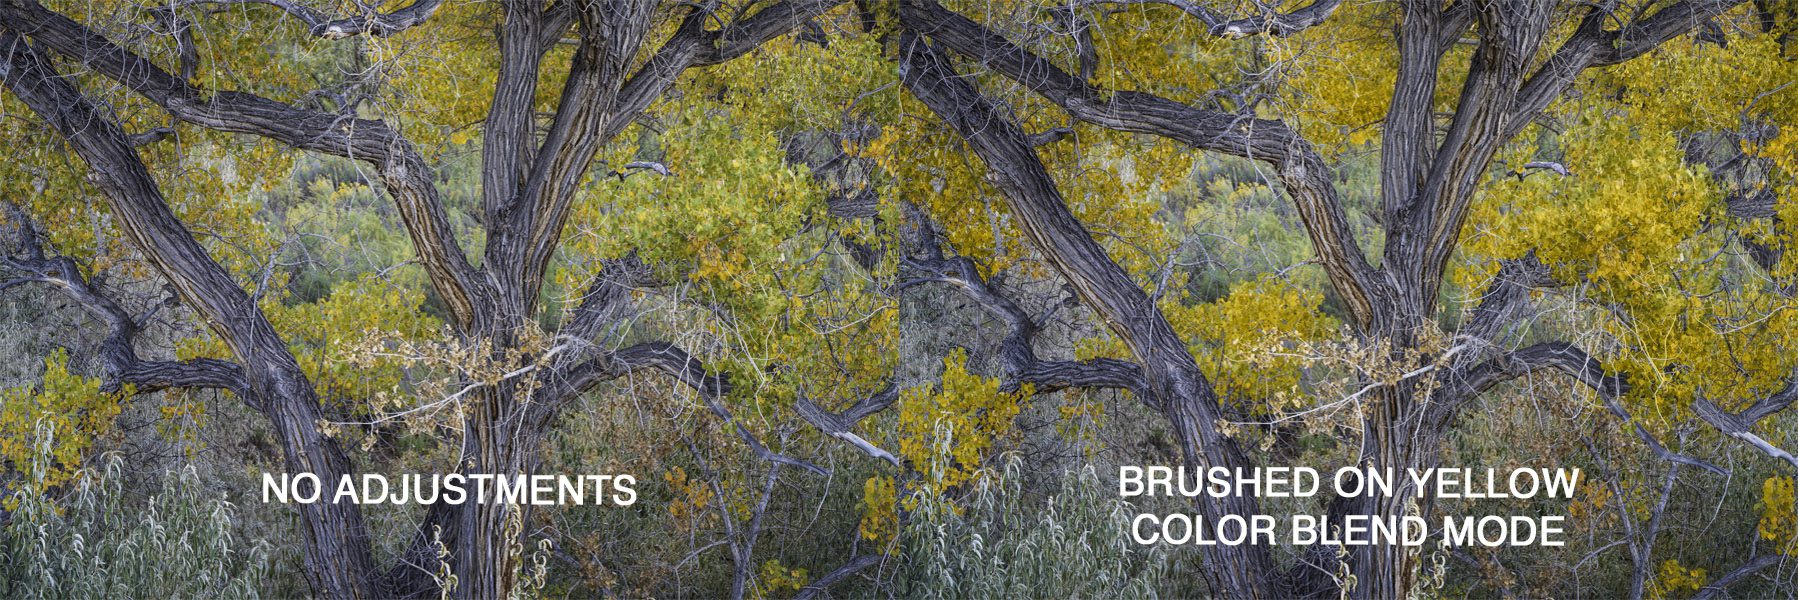
Color: This is used together with the brush tool to paint a new color or colors into your image. This mode doesn’t effect luminosity or contrast, only changing the hue of existing colors. Useful applications include selectively enhancing sunsets, tree leaves, or anywhere you may want to subtly change the existing color.

Luminosity: Because any contrast adjustment in photoshop does so to every color, it also adjusts the saturation of an image. The luminosity blend mode is useful for controlling contrast without accidentally over-saturating your photo.
Conclusion:
The great thing about photoshop is that there are limitless ways to use the tools it provides. The blend modes and methods I’ve listed here work for my editing style, but each blend mode has a use and its own practical application. I hope you can see now that blend modes aren’t something to be intimidated by, they are simply another tool anyone can use to enhance their photographs.