
Photographing Lightning
Photographing lightning is one of the most exhilarating things you can do as a landscape photographer! Chasing storms will really get your adrenaline pumping and Mother Nature’s light show can be mesmerizing. But lightning is also dangerous, so safety is a primary concern. In this article we’ll discuss the safety concerns along with techniques for photographing lightning. Hopefully these tips will maximize your chances of capturing some impressive bolts the next time a storm rolls through.
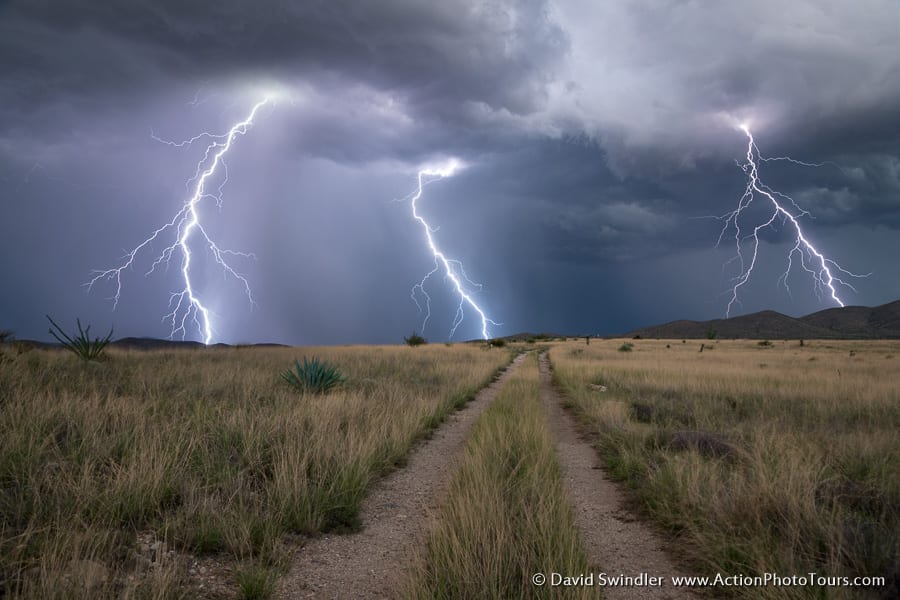
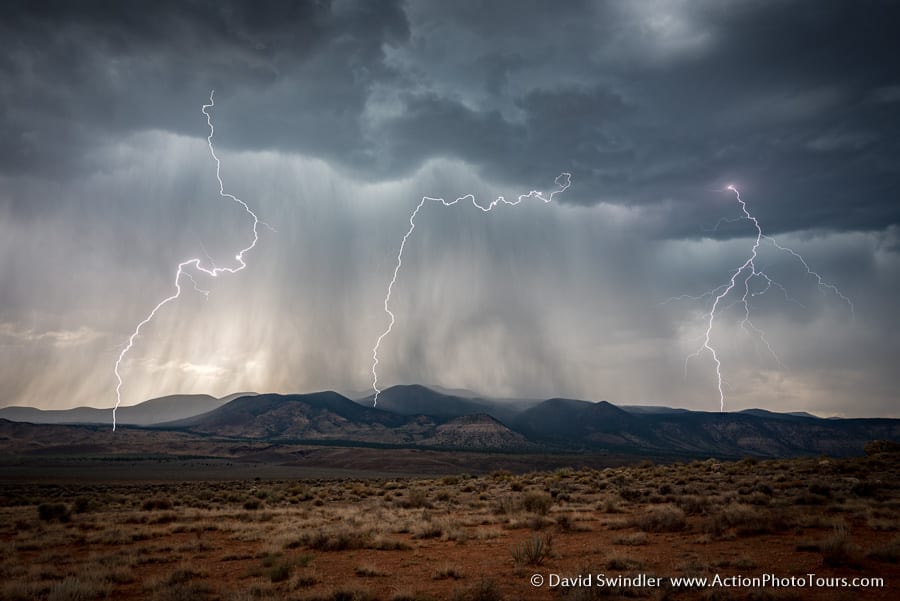
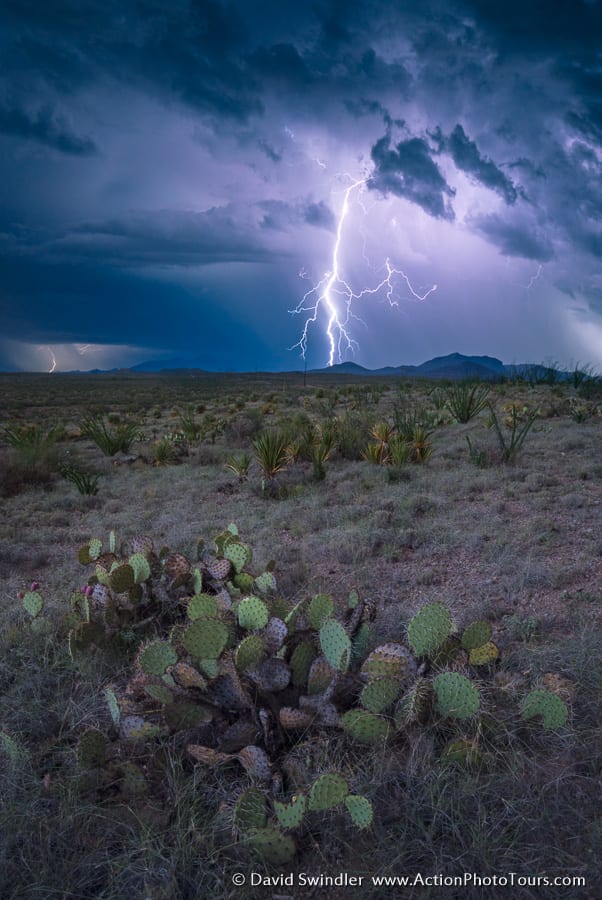
5sec, f/20, ISO 100
Lightning kills around 2000 people every year and is the #2 storm killer in the USA (more than tornadoes and hurricanes combined). 90% of people who are struck survive, but often sustain lifetime injuries. It’s imperative that we give lightning storms a healthy dose of respect. Here are some interesting facts:
- A lightning bolt strikes earth about 100 times per second – over 8 million strikes per day!
- A lightning bolt can reach up to 50,000 F – more than 5 times hotter than the surface of the sun!
- Lightning usually strikes outside the area of heavy rain and but may strike as far as 10-15 miles from any thunderhead (bolts from the blue).
- A vehicle is one of the safest place to be if a storm gets too close. It’s not the rubber tires that protect us, but the metal exterior.
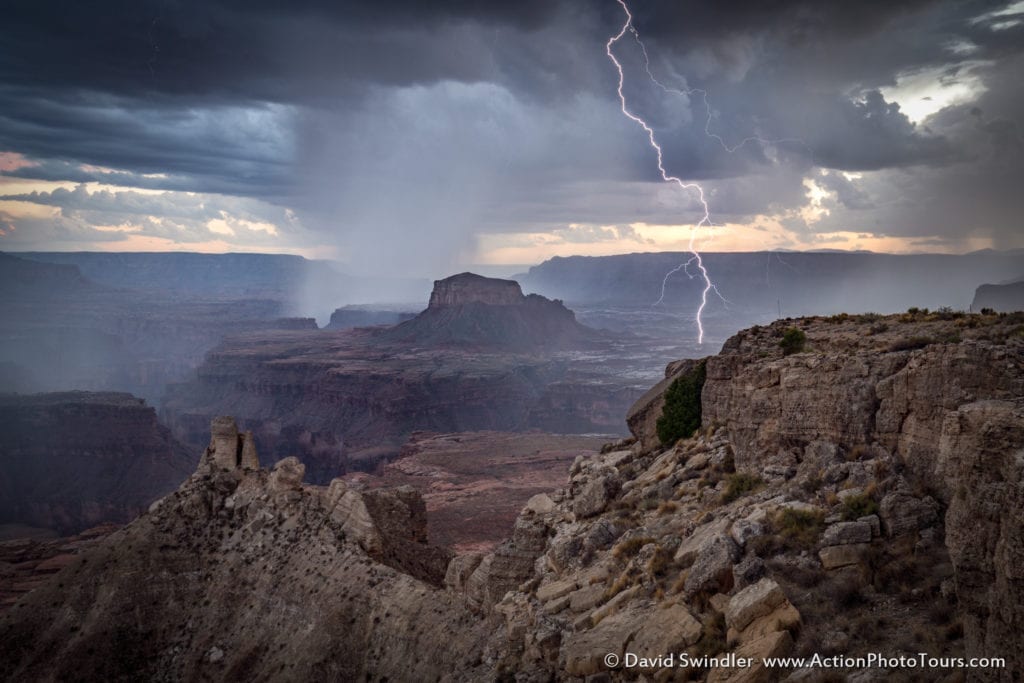
Lightning Trigger, 1/5sec, f/11, ISO 100
So how do we photograph lightning safely? The main thing is to not be out when a storm gets too close. The best lightning photography is often from the side of a storm as it passes by. If you are in the path of the storm, you need to get out of the way! Many apps can help you track the direction a storm is moving. We recommend using Radarscope which will show you the predicted path of the storm along with the intensity of lightning strikes. Here are some additional safety suggestions:
- Never use a tree, cliff or rocky overhang for shelter. Taking shelter under trees is the major cause of lightning deaths.
- Stay away from metal conductors such as wires or fences. Metal does not attract lightning, but lightning can travel long distances through it.
- It’s best not to be the tallest object in the area. Stay away from isolated tall trees, towers, or utility poles. Lightning tends to strike the taller objects in an area.
- Be careful as your tripod can act as a lightning rod!
- When you see lightning, count the time until you hear thunder. If less than 30 sec, lightning is closer than 6 miles and caution should be taken. For every 5 seconds between flash and thunder, the storm is one mile away.
When photographing lightning, one has to use different settings and techniques depending on which category it falls in. There are 3 different classifications: Daytime Lightning, Dawn & Dusk Lightning, and Night Lightning. Daytime lightning is the most difficult to capture. Dusk lightning is the best for photography since your foreground is well illuminated. Night lightning has the highest contrast and can really show off the branches and tentacles of the bolts.
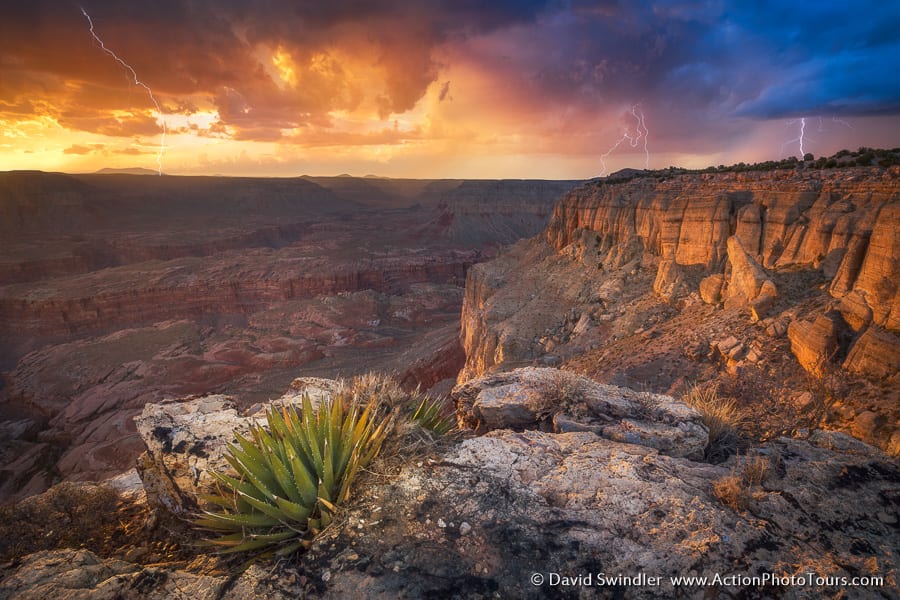
Lightning Trigger, 1/4sec, f/8, ISO 100, Polarizing Filter
Daytime Lightning
The difficulty with daytime lightning is that we’re trying to capture a brief flash of light in bright ambient conditions. If we do too long of an exposure, the ambient light will completely wash out the lightning bolts. Thus, we cannot use a dark ND filter and do long exposures to photograph daytime lightning. As a rule of thumb, the shutter speed should fall between 1/8sec and 1/4sec. We recommend using 1/4sec since that maximizes your chances of capturing the bolt. But how can you trigger your camera to capture that brief bolt within a quarter second? Relying on your reflexes will prove futile and you’ll only capture bolts when you get really lucky. Instead, you need to get a lightning trigger.
Lightning is not a singular event as perceived by our eyes. There are often several bolts that strike within several hundred milliseconds. Lightning triggers work by detecting the flash from the first bolt and triggering the camera to capture the resulting bolt(s). With very bright, isolated lightning, the success rate with using the trigger can be pretty high but there’s no way it can capture all bolts. However, if the storm isn’t as intense and the lightning is scattered around you, the success rate can be very low. The trigger can react to bolts as far as 20 miles away. If there are extraneous bolts outside your field of view, these can trigger the camera and produce false positives since the trigger can react to bolts as far as 20 miles away. But at least memory cards are cheap and it’s easy to delete the duds. Buying a cheap lightning trigger is essentially a waste of money since it won’t work very well. We recommend spending a little more money and getting the Lightning Trigger Brand. These triggers will produce the most consistent results.
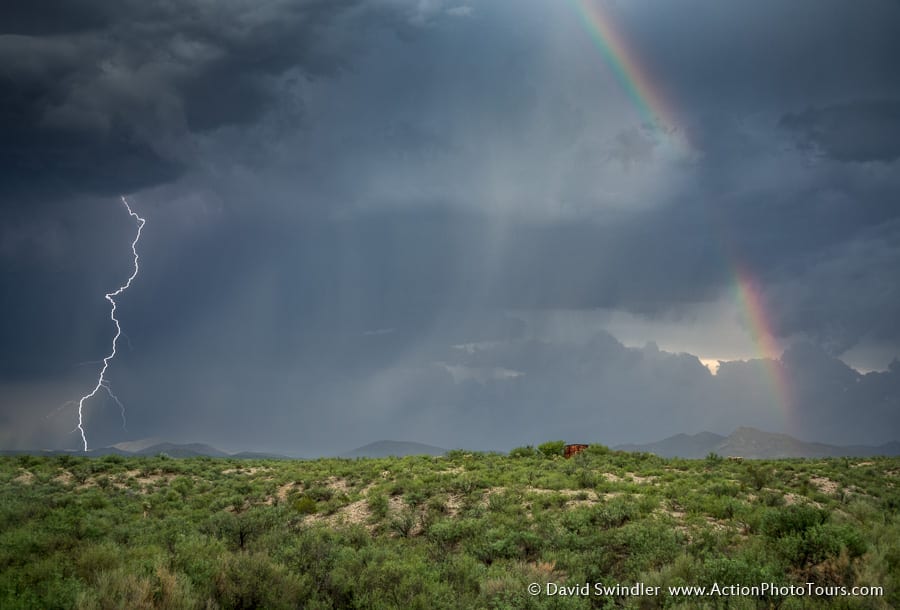
Lightning Trigger, 1/4sec, f/22, ISO 50.
So how do we setup the camera for using the Lightning Trigger? First, we need to eliminate any functions that cause any delay in firing. Set the camera to single shot release mode and turn off any long exposure noise reduction. Focus first and then switch the lens and or camera body to manual focus. Use Shutter Speed Mode and set the shutter speed between 1/4 to 1/8sec. If the aperture value is blinking, that means the camera is unable to achieve the desired shutter speed (i.e. it can’t stop down any smaller). In that case, you’ll need to either decrease your ISO or add a darkening filter like a polarizer or 3-stop ND. We recommend experimenting with the low ISO settings on your camera which often have to be enabled first in the menu. For Canon/Sony cameras, this would be going down to ISO 50. On Nikon Cameras, this is called ISO L-1.0. This trick will often save you from having to add additional filters or use such a small aperture. Setting the exposure compensation a little darker will make it easier to see the lightning as well.
When the lightning trigger is active, it takes complete control of your camera. That means you cannot change exposure values or review images while it is plugged in. It’s very tempting to want to review images and temporarily turn off the trigger. However, this is often when the best bolts will strike! We recommend only reviewing images to check your exposure. You can adjust your exposure up or down depending on how the histogram looks.

Lightning Trigger, 1/4sec, f/11, ISO 200
Dawn and Dusk Lightning
Dawn and dusk lightning are the best scenarios for capturing lightning since you will get better contrast of the bolts but the foreground is still well lit. Even better, you might get bolts right around sunrise or sunset for added drama! When it’s a little brighter out, you will need to continue using the lightning trigger but you will switch to Aperture Priority Mode. Ensure you are using a shutter speed longer or equal to 1/4sec. Once the exposure reaches 2-sec, this is a good time to unplug your lightning trigger and take back-to-back exposures. As with daytime lightning, you will have to focus before you start the exposure sequence. Turn off long exposure noise reduction so there is no delay from shot to shot. To fire off the exposures, program the sequence into an intervalometer or set the interval functions in the camera body. Any bolts captured within the shot duration will be recorded. Regularly check your exposure to ensure you’re not blowing out the highlights. Every once in a while a bolt will be so bright it will blow out everything around it. Don’t worry about these outlier bolts – just concentrate on the average bolt brightness. Continue to use Aperture Priority Mode until you begin exceeding either ISO 400 or shutter speeds get longer than 30 secs.
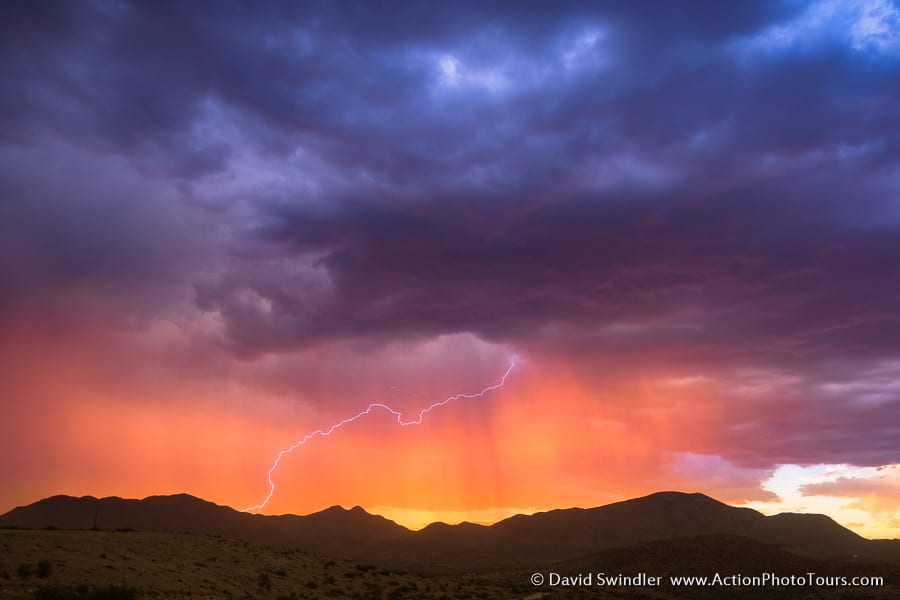
Lightning Trigger, 1/4sec, f/10, ISO 100 with polarizing filter.
Night Lightning
With night lightning, you will use Manual Mode. Set the aperture and ISO based on the brightness of the storm. You’ll start anywhere from f/6.3 to f/9 with the ISO between 200-400. The longer your shutter speed, the more bolts you can potentially capture in one frame. However, if your storm has a lot of cloud structure, long exposures will start to blur that out. We usually recommend keeping the shutter speed between 8-15sec for night lightning. You can go as high as 30 sec, but that tends to blur the clouds. As before, you’ll take back-to-back long exposures using some sort of interval timer. With an active storm, almost every shot can be productive. If the storm isn’t very active, you’ll have a lot of shots to delete. Regularly check your exposure to ensure you aren’t blowing out the lightning.
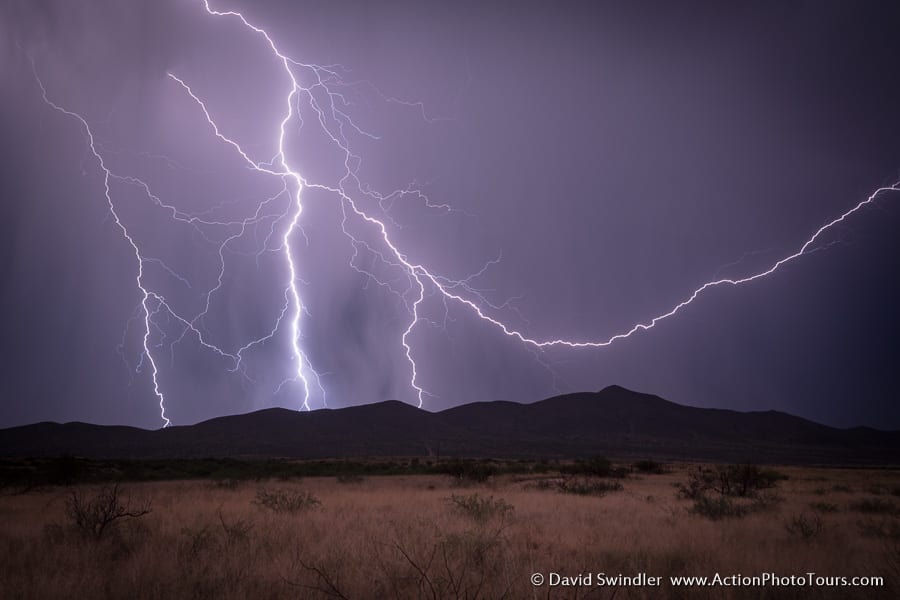
15sec, f/7.1, ISO 200
Focusing the lens at night is not an easy task. If there are light sources or stars visible in the vicinity, zoom in on the light source in LiveView and manually focus until it is sharp. If you don’t have any light sources, you’ll need to either set the focus to your previously determined infinity point or setup a light source you can manually focus on.
As a storm gets closer, it not only gets more dangerous, but also more difficult to photograph. Rain, wind, and hail often accompany storms and can make it impossible to take any shots. It’s best to get out of the storm’s path once rain starts to fall. Photographing storms from behind is often difficult due to the rain shroud around the lightning. The best place to be is to the side of a storm and in front of any precipitation.
15sec, f/6.3, ISO 400
Storm chasing can be amazingly fun and at Action Photo Tours we offer a Storm Chasing Workshop each year during the Southern Arizona monsoon season: Storms and Saguaros Workshop. During the workshop you’ll learn all kinds of new techniques for finding storms, chasing storms, and capturing them to perfection. We’ll also help you with your post-processing. We hope to see you on an upcoming workshop!
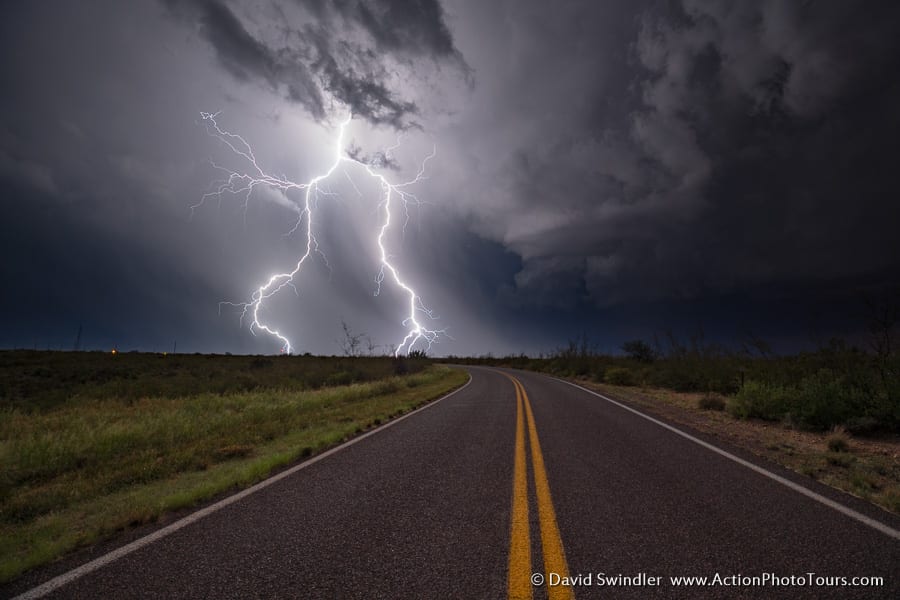
0.4sec, f/6.3, ISO 400
20sec, f/7.1, ISO 400