How to Master Long Exposures
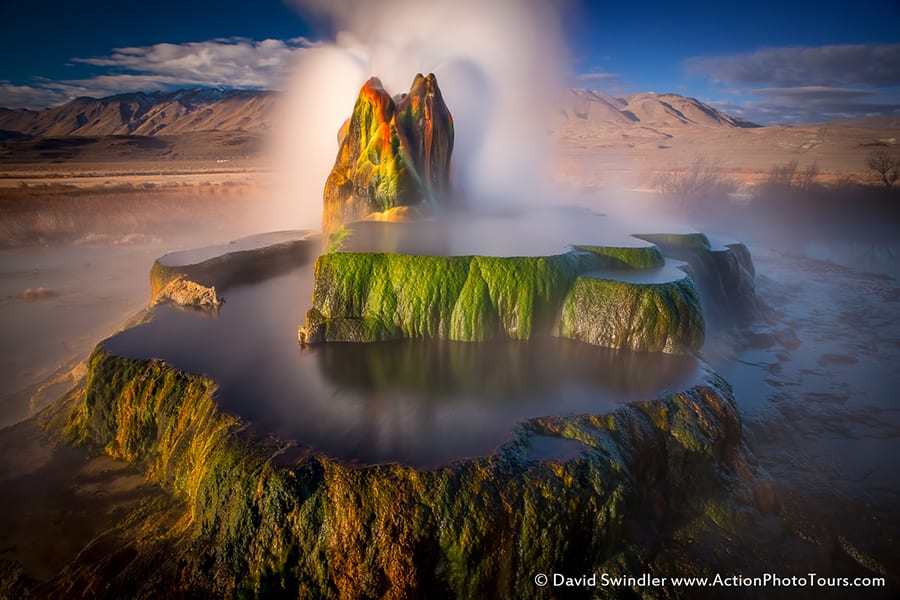
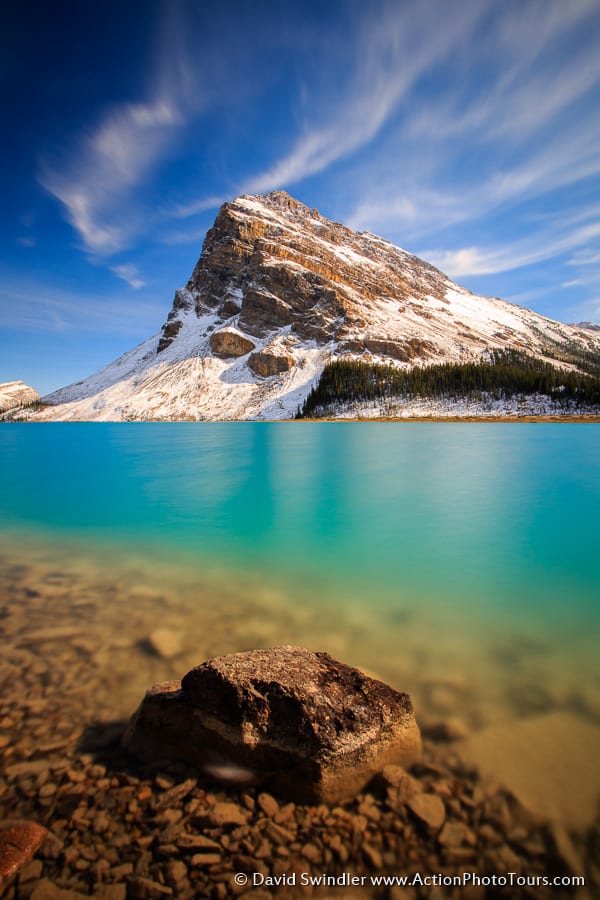
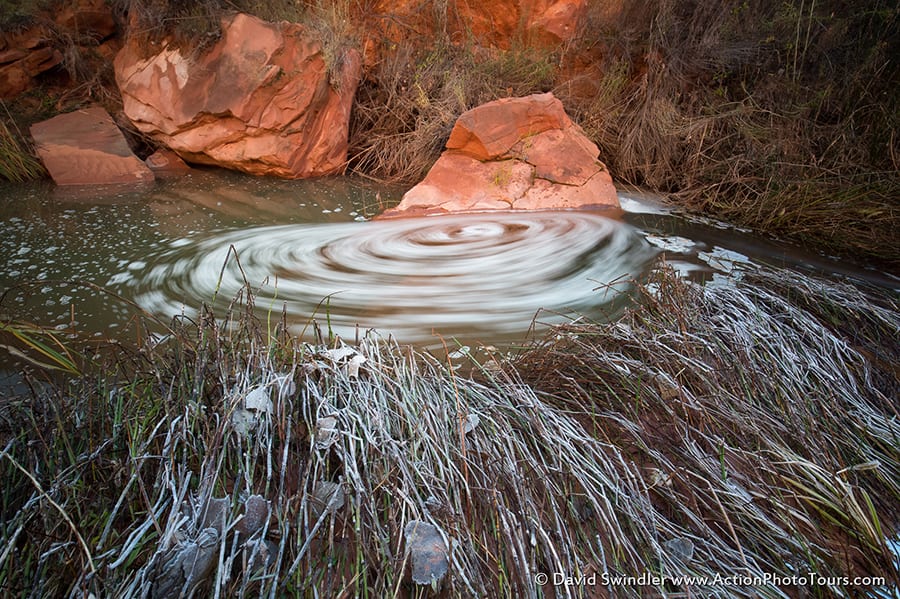
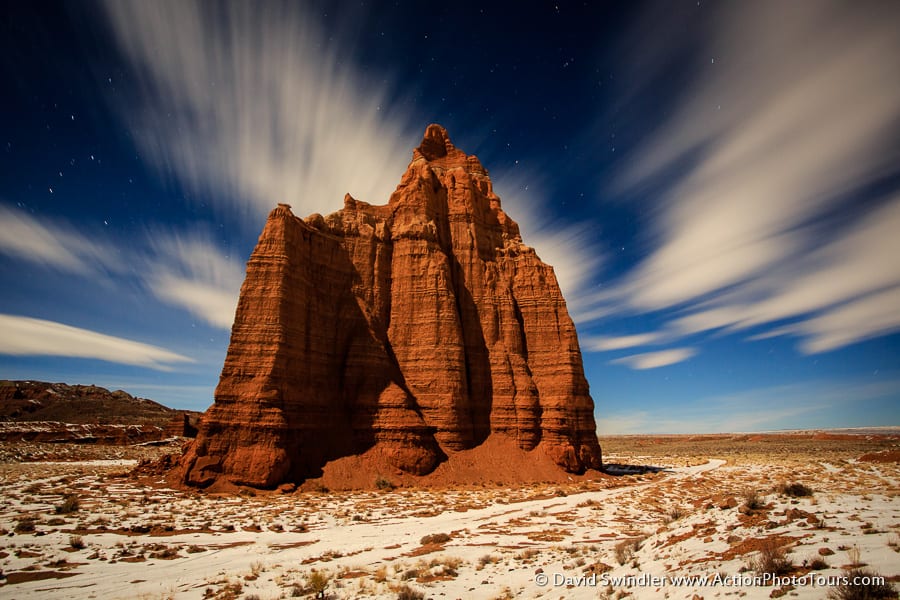
I like long exposures since they show a view of the world we can’t see or appreciate with our own eyes. It’s one of the few forms of photography where the image on the camera can look better than the scene does in person! The image above is a geyser shot from a tall vantage point. I didn’t like the ripples in the water caused by the wind and the geothermal activity. Thus, I took a long exposure to smooth out the water and the steam and effect was magical! When doing long exposures, I like to look for clouds that are racing across the sky, moving water, swirling suds, or light sources in motion. Long exposures also help simplify a scene. For example, if it’s a windy day and the water on a lake is really choppy, I’ll use a long exposure to make the water glassy smooth and more appealing. Such was the case with this shot of Bow Lake below. By getting rid of the ripples, the true color of the lake really came through.
There are many tools we can use to achieve long daytime exposures. During dawn/dusk, you simply stop down your lens and use low ISO for long exposures. As it begins to get brighter, we have to use ND (neutral density filters) and or polarizing filters to get similar long exposures. A polarizer will give you around 3-stops of darkening. I like to use a 3-stop ND and a 10-stop ND. When buying filters, try to get the slim versions, since these will vignette far less when stacked on a wider-angle lens. Also, make sure you avoid the variable ND filters. These might look like a less expensive alternative, but they don’t work very well. Vari-ND’s are essentially two polarizing filters – one that’s linear and the other that’s circular. As you twist one element, you go from 90-degree polarization (little to no light) to zero degree (let’s in all light). The issue with vari-ND filters is that this cross-polarization creates artifacts such as reduced contrast, noisy specular highlights, poor bokeh, and muted colors. You’re far better off just buying a few different ND filters and stacking them as needed. Once you get things dark enough, you can shoot long exposures – even in the middle of the day!
When doing a long exposure, I first decide if I need polarization or not. If there’s glare I need to remove or I want to enhance the sky exposure, then I will use the polarizer. I first find the optimal polarization angle before I put the ND filter on. This is important since you often can’t see well enough to adjust polarization once the ND filter is added. You may also want to adjust your focus before adding the ND filter since it can be difficult for the camera to auto-focus with the ND. If you do this, make sure you switch the lens to manual focus. Next, put on your ND filter. If your polarizer doesn’t allow your ND filter to seat firmly, reverse the order since you want to minimize any chance of vignetting (especially with a 10-stop filter). When you put a very dark ND like a 10-stop, you won’t be able to see anything through the viewfinder. That’s where you’ll need to switch to LiveView mode. On Canon cameras, the LiveView works very well. On Nikons, it doesn’t often work well unless you set the aperture to wide-open and then stop down again when you’re ready to take the photo.
Next, you’ll need to determine your exposure time. To do this, I like to use the high-ISO trick. That’s where I’ll take test shots at very high ISO and then use that exposure to calculate what I’ll need at lower ISO’s. You can try metering the scene in Liveview mode. Sometimes this works, sometimes it doesn’t. If it doesn’t, just switch to Manual Mode and take a “short” exposure at very high ISO (something like 1600, 3200, or even 6400). If the histogram is too bright or dark, adjust the exposure time accordingly and reshoot until it looks right. From there you can use the laws of reciprocity to calculate the best exposure at lower ISO. For example, let’s say my 5-sec test shot at ISO 3200 looks really good. If I were to drop to ISO 1600, then I would need a 10-sec exposure to achieve a similar result. If we keep going, at ISO 400 I would need 40sec and at ISO 100 I would need 160sec.
If your exposure is longer than 30-sec, you’ll need to switch to Bulb mode and use a remote cord or intervalometer (some cameras have a built-in intervalometer). Don’t forget to turn off the IS/VR function on your lens and turn on Long-Exposure Noise Reduction (LENR). With LENR, the camera will take a second exposure after the first one is done of equal duration to the first one. The second exposure is done with the shutter closed (dark frame). The camera then takes the noise signature from the dark frame and subtracts it from the first exposure. This is indispensable for getting rid of hot pixels – something that is very difficult or impossible to remove in post-processing. Finally, play around with different ISO’s and shutter speeds to get the desired long exposure effect you want. I’ll take a number of shots at different exposure times and then choose my favorite once I get the photos on the computer.
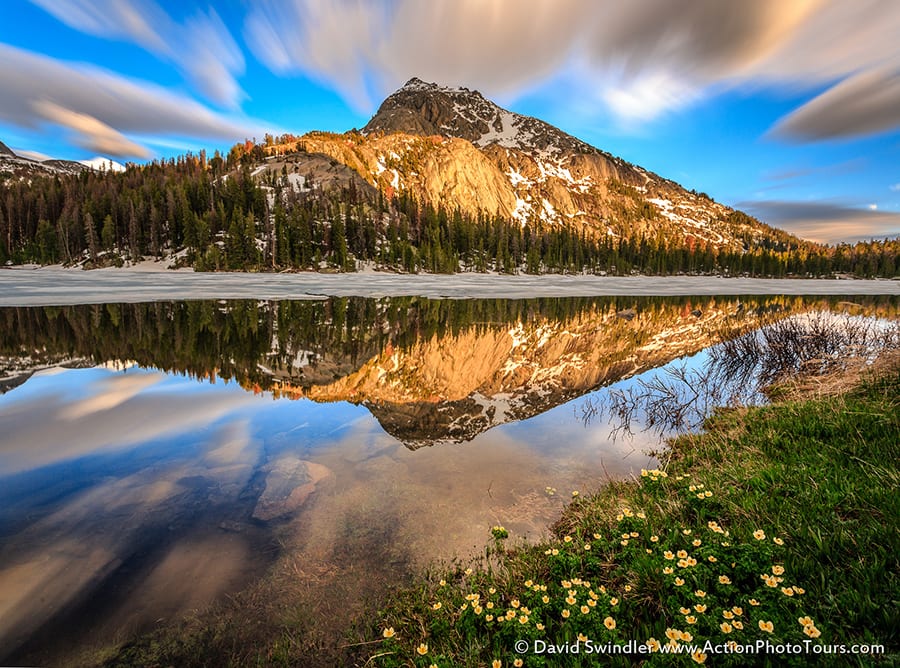
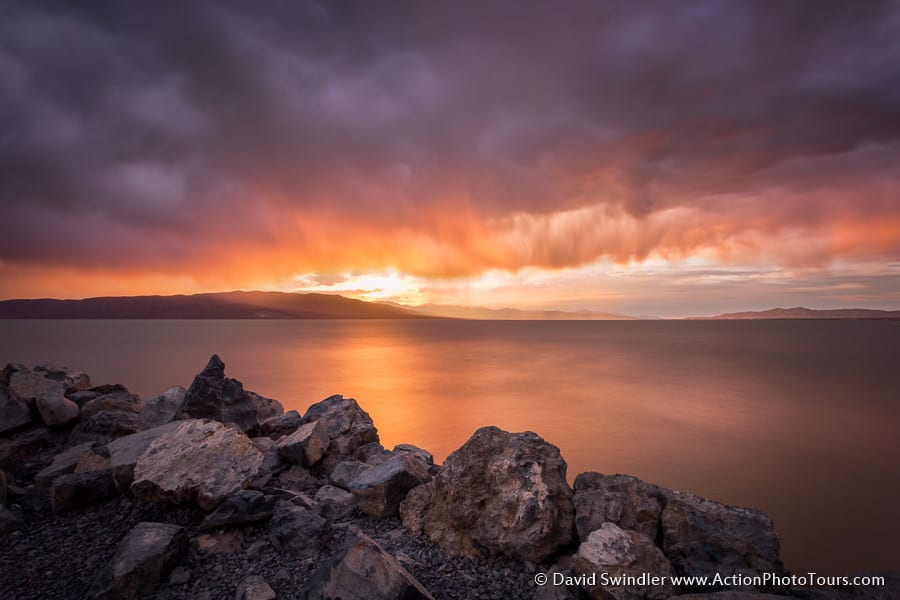
Long exposures take quite a bit of time to setup but they are a great way to add dynamism and a nice surreal quality to your shots. Finally, make sure you have a very sturdy tripod/ballhead and try not to shoot long exposures when it’s windy. If it is, try to weigh down your tripod as much as possible. Unfortunately, it’s usually windy when the clouds are moving quickly. Such was the case in the shot below. I held down the tripod as best I could for a 30-sec exposure, but the detail was still a little bit blurry.