
Long Exposure Noise Reduction
Long Exposure Noise Reduction is a feature we talk a lot about on our night shooting workshops. Most photographers don’t have a clear idea what this function does or why it is necessary. In this article, we’ll explain what is Long Exposure Noise Reduction (LENR), when and where you should use it, and then compare in-camera LENR to other noise removal methods in Photoshop.
With digital cameras, photons are collected on the image sensor and then converted into an electrical signal that feeds into the processor. The longer the exposure you do, the longer the sensor must be powered on. This results in sensor heating and produces a kind of noise called “Amp” Noise. It can cause hot pixels to appear and can lead to brighter edges on the image. Hot pixels can only be seen by zooming in on your photo. They won’t cause any issues for small images you post on Instagram or Facebook, but they will definitely be problematic with printed images. The hot pixels can be white, red, green, or blue spots and occasionally they will look like streaks.
Long Exposure Noise Reduction is different from High ISO Noise Reduction. High ISO Noise Reduction only affects JPG files. LENR on the other hand does affect RAW images and it performs a function that is difficult to mimic in post-production. In the camera menu, you’ll usually have 3 options for LENR: Off, Auto, and On. When set to On, this means the camera will always perform LENR on shots 1sec or longer. With Auto, the camera will do LENR on 1sec or longer only when the camera detects Amp Noise.
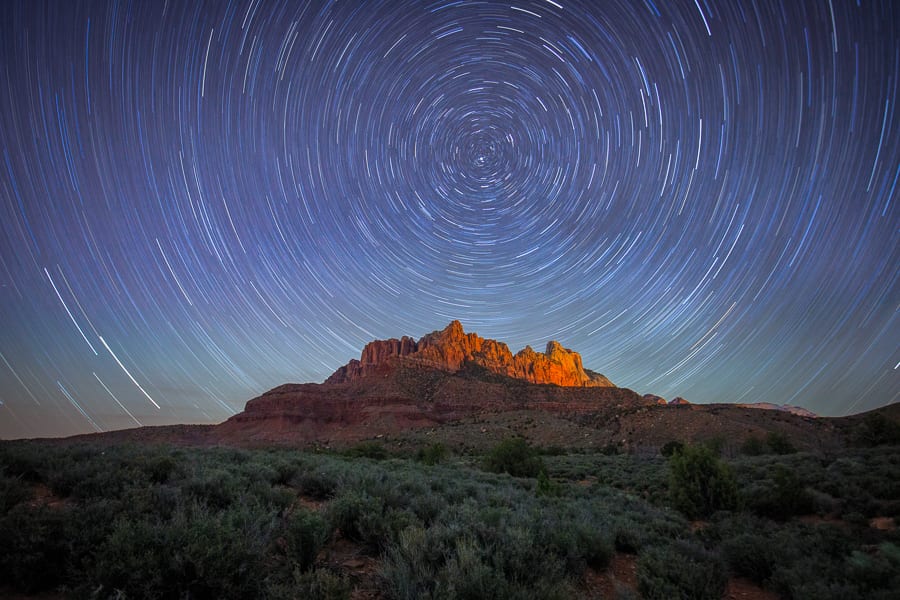
This is a single 50 minute exposure for star trails. LENR was turned on so the camera had to perform a second 50 minute exposure after the first one finished. This resulted in a very clean final image.
With LENR On, the camera will take 2 exposures. The first one is the live exposure where the shutter is open. The second one is a dark-frame exposure with the shutter closed. The dark frame has to be the same exposure length as the live exposure and be done in the same ambient conditions. The camera then takes the hot pixels it finds in the dark frame and subtracts them from the live exposure. LENR essentially doubles your exposure time. If you take a 2-min live exposure, you’ll have to wait another 2-min for the dark frame to finish. Most cameras will not let you do anything else with them while the dark frame is running.
This is a 2-minute exposure at ISO 400 with LENR turned on. With warm ambient temperatures and a >30sec exposure, I knew LENR would be required.
So when should you use LENR? There are three considerations. First you should not use it when time is of the essence when shooting fast moving subjects like aurora borealis, fireworks, and test shots. It should also not be used when you can’t have gaps between shots like when stacking exposures or shooting a stacked star trail shot. But for most night shooting scenarios, you have plenty of time so it’s best to use it whenever you can. Second, hot pixel noise gets worse the warmer the ambient temperature is. When it’s around freezing outside, I get little to no hot pixels unless I’m doing a really long exposure like a 1-hour star trail. But when temperatures are warmer, hot pixels get noticeably worse. I always have to use LENR when shooting night photos in the summer! You will also notice worse detail retention when temps are warmer. The final consideration is exposure time. If you’re shooting 30sec or less, you may be able to get away with not using LENR. But hot pixel noise gets progressively worse the longer your exposure is and the higher your ISO. Because of its dynamic nature, it’s imperative the dark frame is taken at the same exposure time and same ambient conditions.
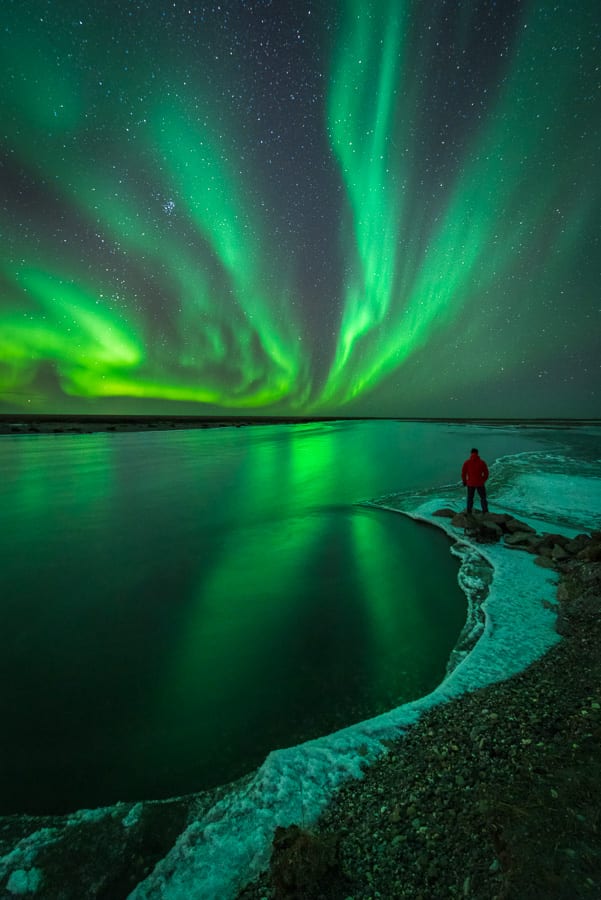
When shooting the Northern Lights, you’ll want LENR off so you don’t miss any of the action! In this shot, no hot pixels were observed because the ambient temperature was well below freezing (see the next shot below).
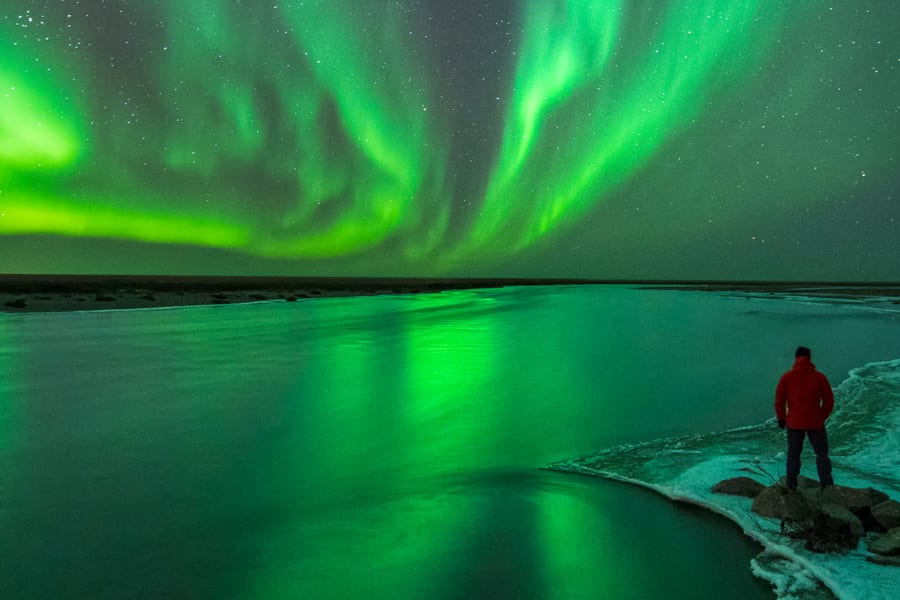
Zoomed in view the above shot showing the lack of hot pixels.
On our Badlands Workshop back in Sept the temperatures at night were very pleasant (between 60-70F), so I knew that hot pixel noise would be an issue. I decided to do a test. I took one one shot at 6 min ISO 800 with LENR and another at the same settings without LENR. The difference was huge! I have provided zoomed in snips of the image below and you can see just how many hot pixels there are without LENR. This would be difficult to clean up in post-processing. Yes, there are still a few hot pixels in the shot with LENR since its not perfect and hot pixels can have stochastic tendencies. However, it is much easier to deal with the hot pixels with LENR applied and you will end up with much better detail retention.
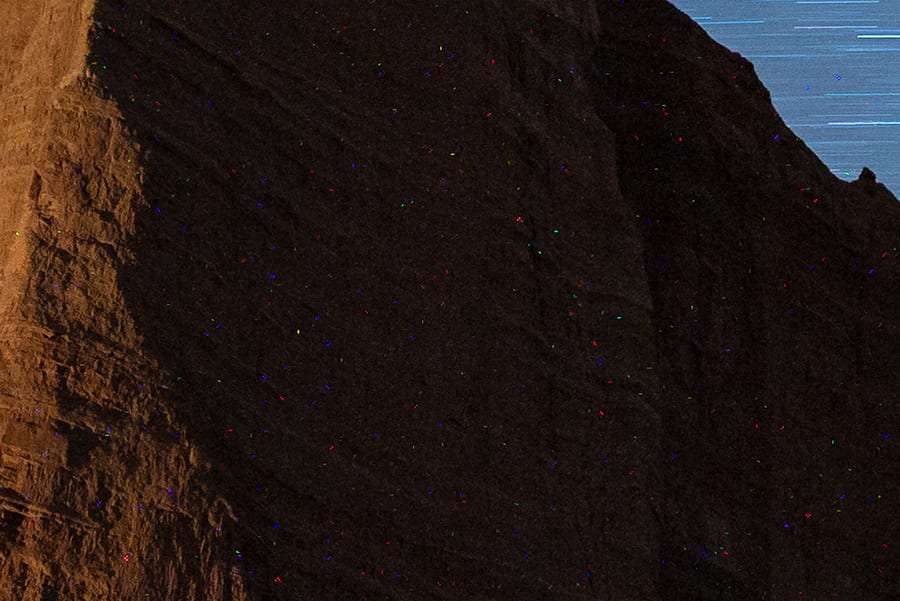
6 min Exposure with no LENR. Notice how bad the hot pixel noise is.
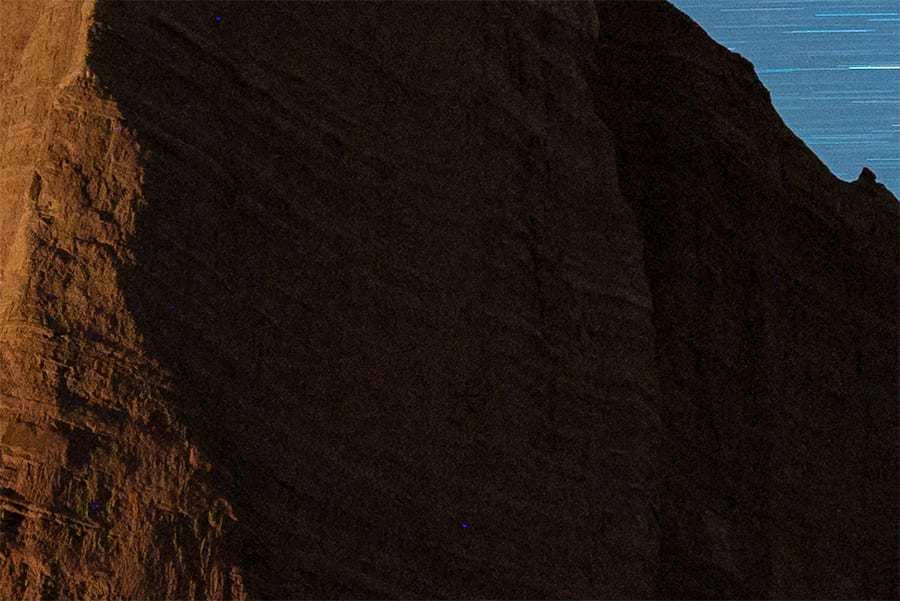
6 min Exposure with LENR. Although there are still a few hot pixels, this is considerably cleaner than no LENR.
My favorite method to removing hot pixels in post is to use Photoshop. Go to the Filter Menu, Select Noise, and then choose Dust & Scratches. This filter has 2 sliders – radius and threshold. First move both sliders all the way to the left. Next, move the radius slider up in one pixel increments until your hot pixels disappear. Don’t move this any higher than is necessary. Second, move the threshold slider to the right until you see the maximum amount of detail retention without the hot pixels coming back.
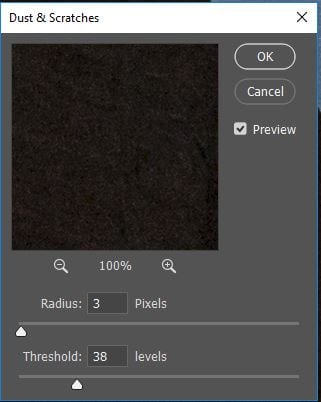
The Dust and Scratches Dialog Box
What would happen if we took both of the test shots and applied the Dust and Scratches filter? The no-LENR shot required a lot higher radius and lower threshold to remove the hot pixels. This resulted in considerably less detail than in the shot with LENR (see images below). This shows that using LENR in the field can produce better results than what we can achieve with post-processing methods. Some people like to shoot their dark frames manually by putting the lens cap on and shooting one or multiple frames for each exposure length they do. This can save time in the field, but will add time in post-processing. You can then load your dark frame with your live exposure in Photoshop and use the Subtract blend mode. I will do a comparison of the dark frame method vs LENR in a different article. But since most folks I work with want a simpler post-processing workflow, I recommend using LENR when appropriate. But even with manual dark frame subtraction, this may not clean up all hot pixels, so you’ll still have to apply the Dust & Scratches filter.

6 min Exposure with no LENR and Dust and Scratches Filter Applied. Notice how much detail we have lost!

6 min Exposure with LENR and Dust and Scratches Filter Applied. With this approach we have the best detail retention.
Our night photography tours and workshops are very popular since we operate in areas with some of the darkest skies in the country! Check out some of our offerings below and we hope to see you sometime in Southern Utah!