False Kiva
The archaeological site known as False Kiva is one of the most dramatic places in Canyonlands National Park. However, it is seldom visited since there is no marked trailhead and the Park Service doesn’t publish directions on how to get there. The reason is simple: if too many people visited the site, it wouldn’t be long before it was destroyed or vandalized. A kiva is a room or chamber that had religious significance to the Pueblo Indians. They can be both large and small. In the case of False Kiva, it is housed in a small cave perched on the side of a cliff. Inside, there is a circle of stones of unknown human origin. Since the experts can’t determine who made it, the site became known as False Kiva. It could have been an actual kiva; there just isn’t any evidence one way or the other. Regardless, a visit to False Kiva should not be missed. It’s almost like stepping back in time; you can envision Native Americans occupying the same cave many years ago while contemplating the enormous view overlooking the canyon. Pictures simply can’t do it justice – you really just need to go there in person!
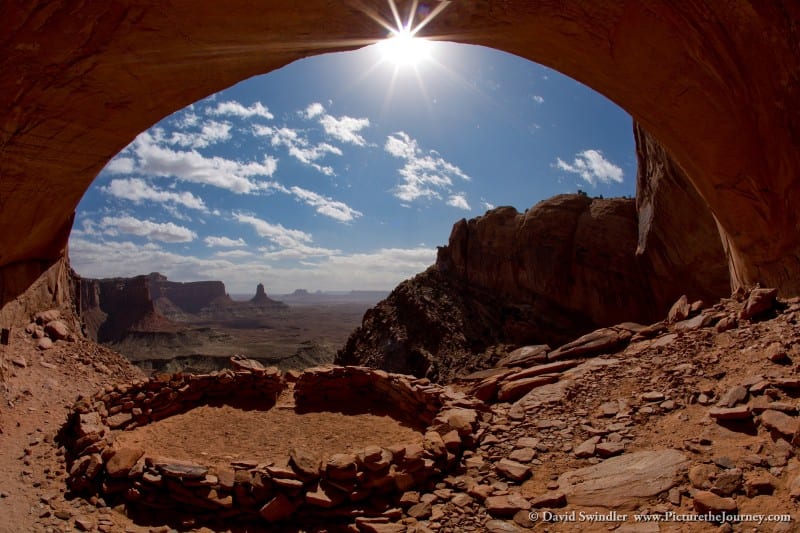
At the end of this article, I will provide some basic directions on how to access False Kiva. Bear in mind that this is not a hike for those who are afraid of heights or aren’t physically prepared. In can be rough, steep, and slippery. Please use caution. I really wanted to take night photographs at False Kiva. However, I decided I should go out there once during the day just to make sure I could find it. It was a good thing I scouted it out – it was hard enough to find during the day and would have been nearly impossible to find at night. The image above was taken around mid-afternoon right as the sun was beginning to hit the top of the alcove.
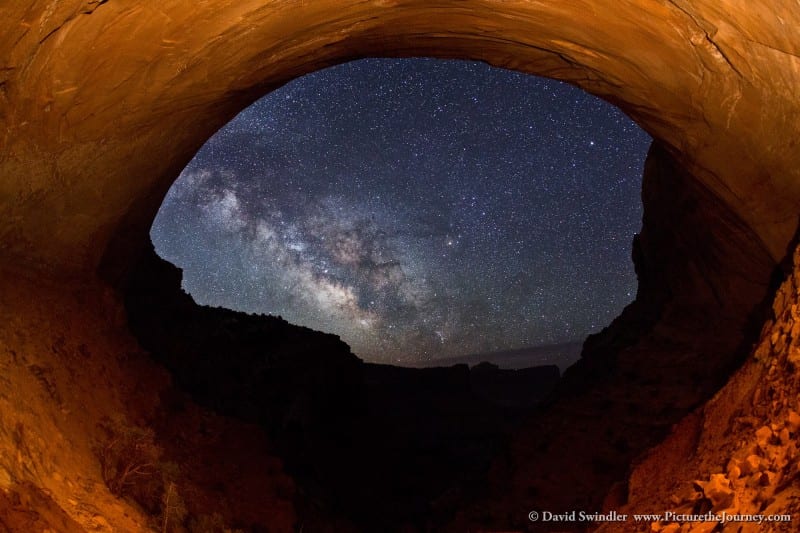
I returned later that night to hike into False Kiva. As I was hiking in, I was impressed with how quiet and still everything was. On the way, I passed through this large alcove shown above. It had a clear view to the southeast while False Kiva faces due south. Since I visited during the spring months, the Milky Way was still to the southeast. Later in the summer, the Milky Way will be visible from False Kiva itself. Thus, I recommend visiting during the summer if you can. In addition, you may see some sweet thunderstorms on warm August nights! For the shot above, I used my fisheye lens to get the entire alcove in the frame (it’s amazingly big). I struggled with how to light paint it. Shining my spotlight directly on the walls was way too bright compared to the light of the stars. Thus, I ended up shining my light on the very back of the alcove and using only reflected light. It worked surprisingly well.
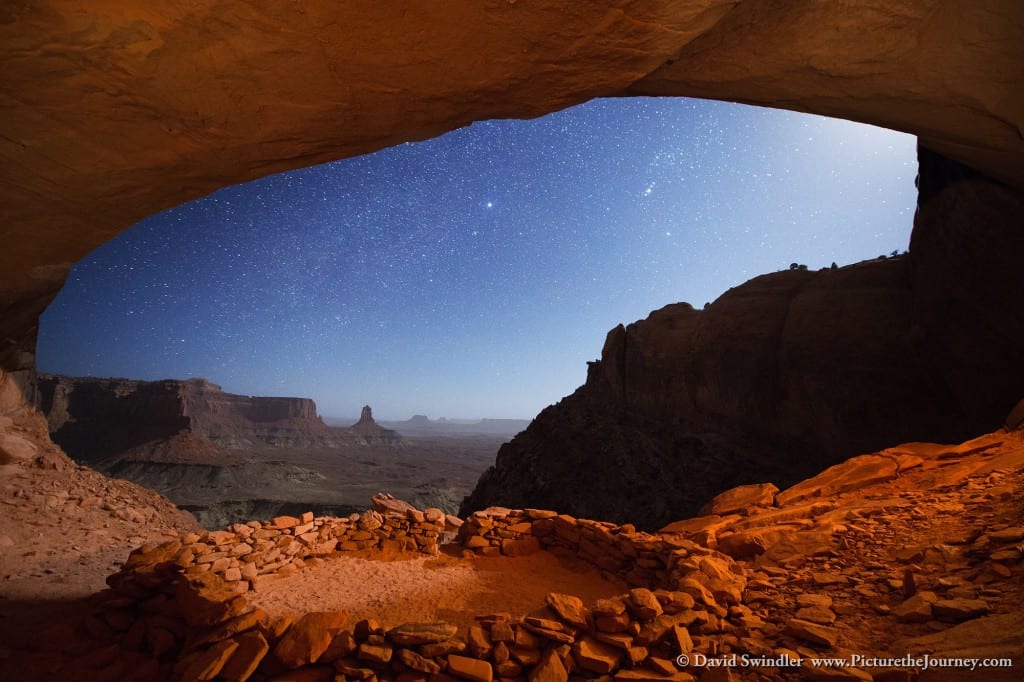
By the time I got setup at False Kiva, the moon was out. I had planned this since I needed the moon to light up the valley floor far below. Fortunately, the moon was just high enough to be out of view from inside of False Kiva (you can see the bleed-in light of the moon on the upper right side of the image). I tried numerous light painting techniques but it was challenging since the cave was so small. The light painting that worked best helped cast side shadows on the stone circle, giving it a feeling of depth. If I used reflected light, the stone circle just looked flat and uninteresting.
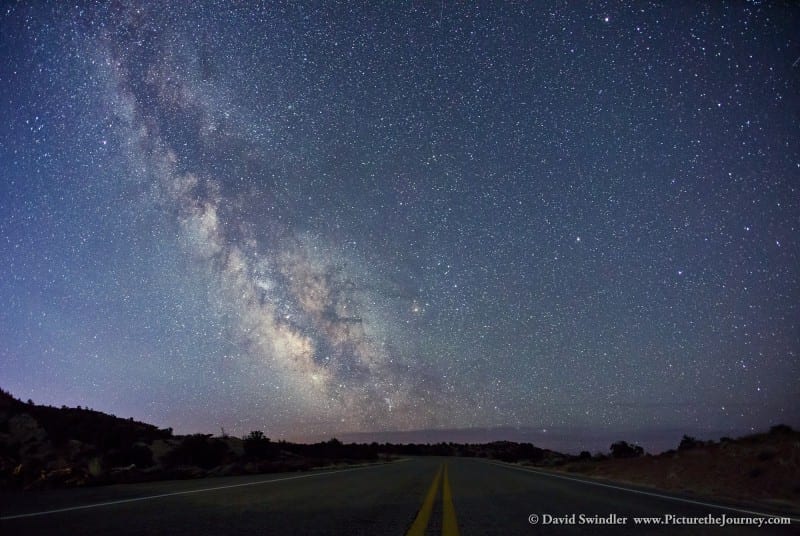
When I got back to my vehicle, I looked behind me and saw this incredible view of the Milky Way over Upheaval Dome Road. Even though I needed to get to Mesa Arch for sunrise, I quickly put my tripod as low as it would go and captured this image. It was taken shortly after astronomical twilight ended, so there was a little bit of light coming in from the rising sun (sunrise was still a good hour and a half away). I quickly drove over to Mesa Arch and fortunately, there was still room for one more tripod! After Mesa Arch, be sure to check out Aztec Butte while you’re in the area.
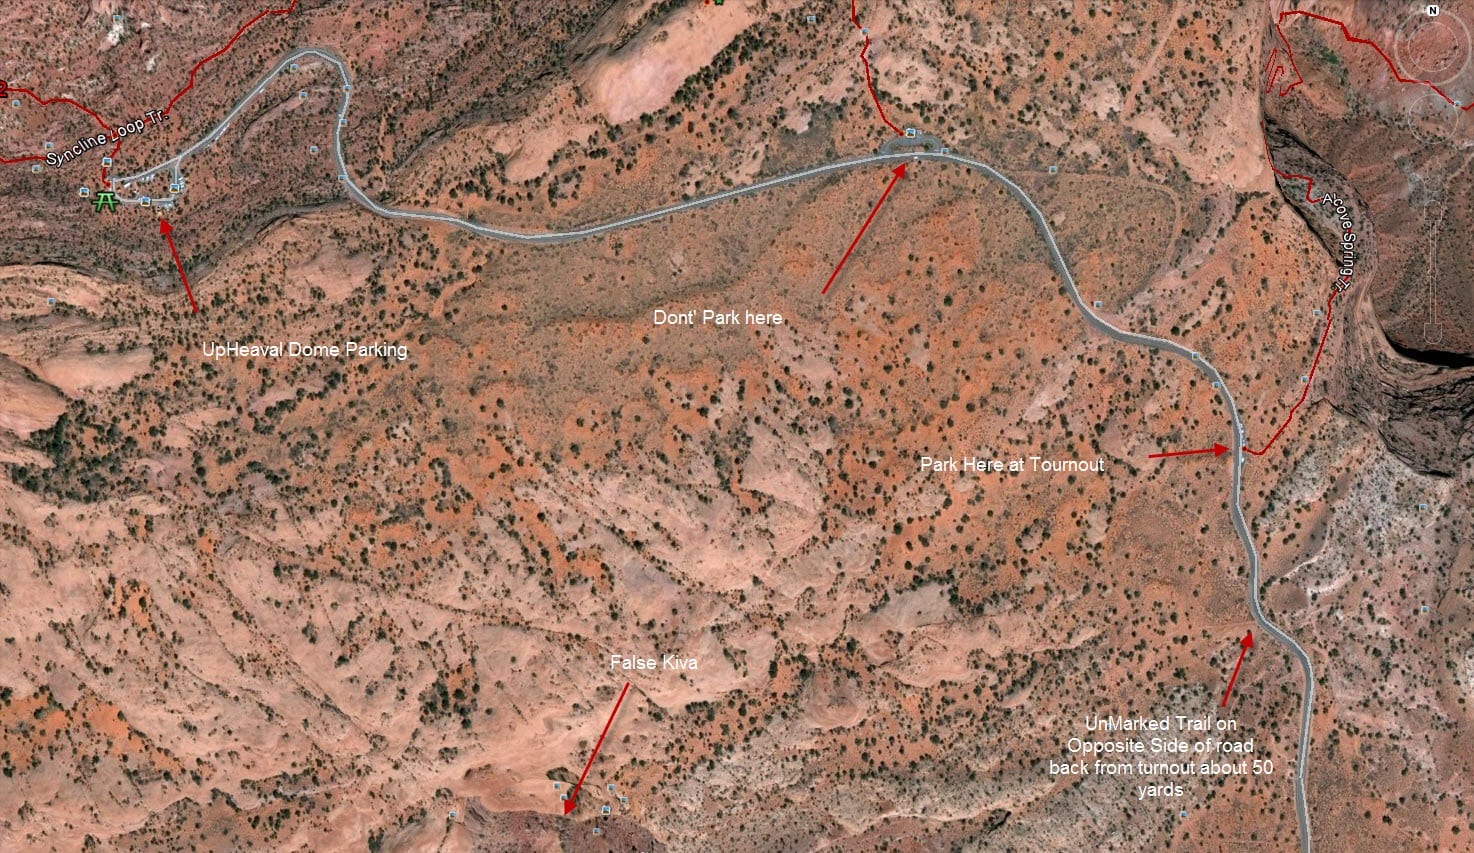
To get to False Kiva, park at the Alcove Springs Trailhead on Upheaval Dome Road. Hike back the way you came about 50 yards and you’ll see a barricade on the right side of the road. After the barricade, look for a small trail heading off to the right. The trail is fairly well trodden by now and is easy to follow. It eventually winds down through a small canyon. Keep watching for cairns as they help point the way. When you get close to the edge of the rim, the trail gets steeper and goes down a loose scree slope. Watch your footing here. As you’re going down, keeping looking up for a large alcove. Once you see it, start climbing back up. It almost looks like the trail keeps going down, but it doesn’t. Once in the alcove, climb up to the top and head to the right. A short scramble from there and suddenly you’ll be in False Kiva. You’d never even know it was there unless you had previous experience! Don’t rely on a GPS to get here. I found that the cliffs obscured my signal and the GPS was way off from where it should have been. Robert Shreve has published a good map on his blog site: